Last Updated on February 28, 2023
There are a couple of different ways that you can center your proportioning valve in your brake line. You will want to make sure that you follow the instructions that came with your particular device.
Some valves have specific braided hoses that must be used in order for them to work correctly. If this is the case, then you will need to find these hoses and make sure that they are centered before you attach them.
You may also want to check the height of your caliper in relation to the rest of the brake line in order to ensure that it is properly balanced. If not, the consequences of having it off balance can be pretty serious.
Not only will it make your car harder to stop, but it could also lead to tire fade and even a catastrophic failure. The good news is that adjusting it is relatively easy to do.
This guide can help you learn how to center proportioning valves in just a few simple steps and make sure that your automobile’s brakes are functioning properly.
How to Center Proportioning Valve: A Step by Step Guide
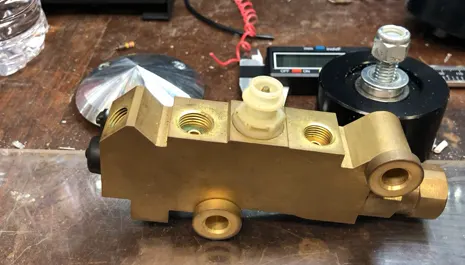
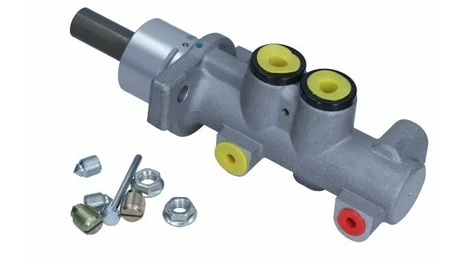
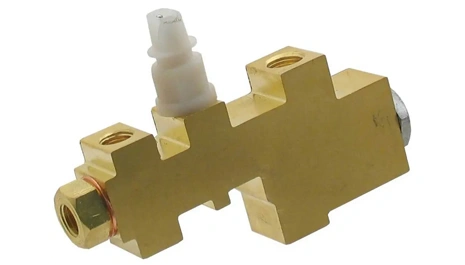
Proportioning valves are devices that help to maintain a balance between the pressure in the braking system and the vehicle’s weight.
If the weight of the automobile increases, the pressure on the tires needs to be increased as well. Without properly centered, the front brakes would receive more fluid than the rear, resulting in poor braking performance.
Its primary function, a valve can also help to reduce restraint fade by equalizing pressure between the front and rear wheels. As a result, it is an essential part of any disc system.
Here are the steps you need to take in order to center the valve in your hydraulic line:
Step One: Gather All Necessary Tools
Before you begin any project, it is important to gather the appropriate tools and supplies. This will help you to avoid any unexpected delays or disruptions once you get started.
You will need:
- A wrench
- Brake fluid
- A bleeder tool
- A friend (optional)
As soon as you have all of the proper tools, you can start the project.
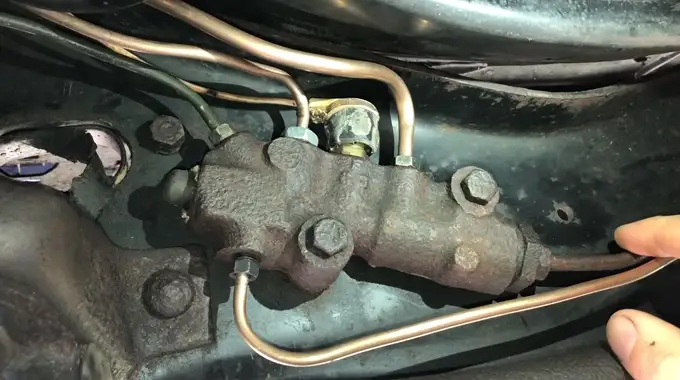
Step Two: Locate the Valve
Depending on the make and model of your vehicle, the valve may be located in different places. It is typically track down either on the frame near the master cylinder or on the firewall in the engine bay.
Once you have discovered it, you will need to identify the two ports on either side of the body. These ports are where brake fluid enters and exits, and they are typically labeled with an “IN” and an “OUT” designation. The moment you’ve found and identified the ports, you are ready to move on to the next step.
Step Three: Bleed the Brakes
Now that the valve is located, it’s time to start bleeding the brakes. This is a crucial stage, so be sure to follow the instructions carefully.
First, locate the bleeder screws on each of the calipers. These are small screws that are typically located near the top of the caliper. Once you have found the screws, use a wrench to loosen them slightly.
Next, open the bleed valves on the master cylinder. These are usually located on the lid of the master cylinder. Once they are open, pump slowly and steadily until you see fluid coming out of the bleeder screws.
Step Four: Center the Valve
The next step in the process of centering the valve is to measure the reservoir’s fluid level. If the level is low, add more liquid until it is at the correct level. Once the reservoir is filled, pump the brake pedal several times to build up pressure.
Next, loosen the bleeder screw and allow a small amount of gas to escape. Tighten the screw and repeat this step until there are no more bubbles in the fluid.
Finally, check fluid levels again and add more if necessary. With the reservoir full and there are no air bubbles, your valve should be level and your clutch should be working properly.
Step Five: Test the Brakes:
Finally, you should test your brakes and see how they react as well as how your ride handles. If everything feels normal, then you have successfully centered the valve, which will result in it functioning properly.
You should test the rear decelerate in both wet and dry conditions to make sure that they are working correctly in all weather conditions. These are merely a few of the easy steps that you can follow to ensure that your vehicle’s brakes are working correctly.
How to Diagnose Brake Proportioning Valve Failure?
During the braking process, a valve plays a very significant role. Every year, countless drivers experience brake problems due to a failing clutch. If you suspect that your device is failing, it is essential to take action immediately to prevent further damage.
There are a few ways that you can look out for that may indicate that your braking is failing. Here are a few of the most common steps:
Release the Emergency Brake Completely
The emergency brake, also known as the parking brake, is a vital safety system that helps to keep your vehicle stationary. When properly engaged, it will prevent your car from rolling, even on a steep incline. As long as it is not released before driving, it can damage the valve.
When diagnosing this type of failure, the first step is to completely disconnect it. Once the emergency brake is released, you should then check for any leaks in the system. A leaking hydraulic can cause a loss the pressure, resulting in less effectiveness.
Check the level of fluid in the reservoir
One of the first steps in diagnosing the proportioning valve failure is checking the amount of stopping fluid in the reservoir. In-sufficient amounts could indicate a leak in the system. Another possibility is that it is not functioning properly and is allowing too much fluid to pass through.
Either way, a low fluid balance will need to be addressed before proceeding with any further diagnosis. Once the liquid level has been checked, the next step is to inspect the control device for any obvious signs of damage or leakage. If there is any damage, it must be repaired or replaced.
Driving and Hard and Medium Stops
A good way to test the brake proportioner is to go out and do some quick stops and slow ones from different speeds. What you’re looking for is any difference in the feel of the pedal or if the vehicle seems to pull to one side more than usual.
If you notice either of these things, it’s a good indication that there may be an issue. Another thing to keep in mind is that if the machine has ABS, you won’t be able to perform this test as accurately. That’s because ABS will kick in and hide any proportioning problems.
Test the Brake Sensor
The sensor is a key component of the safety system, and its failure could have serious consequences. To test it, first, disconnect the negative battery cable. Next, remove it from the proportioning valve. With a multimeter, check for continuity between the sensor terminals.
If there is no continuity, replace the device. If there is continuity, check for resistance between the device terminals. If the resistance is outside the specified range, replace the detector.
Finally, reconnect the negative power connector and test the system for proper operation. If the machine does not operate properly, analyze and repair any electrical issues that may be causing the problem.
Check for Air in The System
Although a brake system is designed to be airtight, over time, leaks can develop, allowing gas to enter the mechanism. If too much air gets into the circuit, it can cause a failure.
To find any air bubbles in the line, start by opening the bleeder valves on each caliper and allow any remaining bubbles to escape. Next, check the master cylinder for leaks, and if any are found, repair them as soon as possible. Finally, bleed the brakes according to the manufacturer’s instructions.
By taking these measures, you can help ensure that your system is free of air and operating correctly. By following these steps, you can diagnose and repair a faulty brake valve.
If you are not comfortable working on your vehicle, it is always best to consult a qualified mechanic. They will have the knowledge and experience needed to properly diagnose and repair your automotive parts.
FAQ’s
Let’s have a look at some frequent questions that people ask about centering the proportioner. It will give you a clear idea:
1. Does a 4-Wheel Disc Need A Proportioning Valve?
When you add a 4-wheel disc system to your vehicle, you need to also install a proportional valve. This is because the new disc will change the braking dynamics of your car.
The front tires will provide most of the stopping power when your car is under normal circumstances. If you were to slam on the gas in an emergency situation, all four brakes would engage and stop the car.
2. How Does the Proportioning Valve Control Front Brake Pressure?
The front brakes are designed to do the majority of braking, and the side ones provide additional power and stability. Applying too much force to the rear can cause them to lock up, which can lead to skidding and loss of control. Using a valve, you can prevent this by reducing the load on the external drums.
As a result, the front wheels do most of the work while they supply the additional stopping power and help to keep the vehicle stable. This system ensures that the wheels have maximum traction during a stop, which helps to prevent skidding and maintain control of the car.
3. How Do I Know If My Proportioning Valve Is Bad?
If you’re noticing that your car isn’t stopping as quickly as it used to, it might be time to check your proportioning valve. This component is responsible for regulating the amount of fluid that goes to both wheels.
If it’s not working properly, you might notice that your car nose dives when you suddenly apply the brakes. Additionally, your car may not stop instantly as it should, and the rear wheels may lock up easily – especially on wet surfaces.
4. What Happens If I Don’t Use a Proportioning Valve?
If you are not using a proportioning valve, the pressure from your brakes will be redistributed unevenly. This can cause your front tires to lock up, which could lead to an accident. Additionally, without it, your rear will not be engaged as much as it should be.
This could cause you to lose control of your vehicle if you need to stop suddenly. Overall, it’s important to use a valve to ensure that your stoppers are working properly. Not only will this help to keep you safe, but it will also prolong the life of your braking system.
5. Can I Replace the Proportioning Valve Myself?
It depends on your level of automotive experience and comfort working with automotive systems. In general, it is not recommended that you attempt to change the valve yourself unless you are comfortable working with hydraulics and have some experience with automotive repairs. It plays a crucial role in the safety process, so if it is not installed correctly, it can cause serious problems.
If you are not confident in your ability to replace the valve, it is best to take your vehicle to a qualified mechanic. While it may cost you a bit more money, it will save you the hassle and potential expense of having to repair a faulty mechanical system.
Conclusion
It is time now to put these tips into practice after you have learned how to center proportioning valves in a brake line. Make sure that you remember these pointers and follow them carefully in order to drive safely at all moments. It is always better to be safe than sorry.
Also, don’t forget to get your discs checked at least once a year and to bleed them often. They’ll remain in good shape and work properly this way. Doing so will prevent any problems with your vehicle functioning properly and help you avoid any problems.