Last Updated on May 7, 2023
Installing a lift kit is an excellent way to upgrade your vehicle and give it the extra clearance needed for off-roading or adding larger tires. But when trying to determine how long it takes to install a lift kit, different factors come into play that can affect the timeline.
It depends on the size of your vehicle, the complexity of the installation, and whether you do it yourself or hire an expert.
Installing a lift kit can vary in time, depending on the specific job. In some instances, it may take no more than 2-4 hours to complete the project. Then again, 4-8 hours may be required to install some lift kits properly.
Some applications can require upwards of 12 to 16 hours to install the lift kit properly. So, the time range is approximately 2 to 16 hours for the entire job.
Let’s dig into what impacts this timeline and explore how long it might take to pimp out that ride with some extra off-road suspension love.
How Long Does It Take to Install a Lift Kit: Factors That Affect
When giving your ride a lift, there are lots to consider. Installation time can vary depending on several factors, from the complexity of parts and design to personal tools and expertise. So don’t forget, it pays to be prepared for success when upgrading with a kit.
1. Type of Lift Kit
The type of lift kit you choose to install is likely the biggest factor that affects installation time. Body lift kits are generally the easiest and quickest to install, as they involve bolting brackets and blocks onto the body of your vehicle.
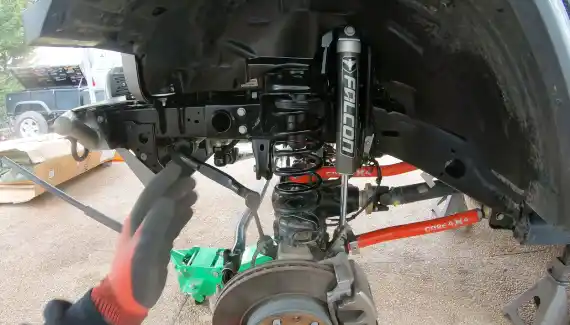
Suspension lift kits require more complicated parts to be installed, including new control arms, shocks, struts, and coils.
Coilover lift kits are even more involved, as they require custom-designed parts to be installed to raise the vehicle’s ride height.
2. Experience of Installer
The installer’s experience is another factor that can greatly affect installation time. An experienced mechanic who has installed several types of lift kits will typically be able to complete the job in less time than someone who has not done this before.
They’ll also know how to properly align and adjust the components so that everything fits correctly and there are no discrepancies in performance when driving.
Aside from that, they may have access to tools that can speed up the installation process or have relationships with parts suppliers, which can reduce wait times for hard-to-find components.
Inexperienced technicians must take their time and ensure everything is installed correctly for a successful lift kit installation.
3. Condition of Vehicle
The vehicle’s condition also plays a role in determining how long it takes for a lift kit to be installed. If the vehicle is already damaged or has rust spots on its body, the mechanics may need additional time to repair these areas before they can work on the lift kit itself.
Also, if any parts are missing or broken during installation, this could potentially require further repairs, which could add extra hours to the project timeline overall.
4. Additional Modifications
Any additional modifications made at the same time as installing a lift kit will also affect installation time.
Any changes made outside of what’s included in the kit itself must be considered when calculating the total labor hours needed for completion.
For example, if you decide you want new bigger tires or wheels along with your new lift kit, then it will take longer than usual. Since these additions need to be measured up and fitted correctly with all other components too.
Time Estimates for Different Types of Lift Kits
Varying types of lift kits mean various levels of installation time. Here are some general estimates for each type:
1. Body Lift Kits
Regarding body lift kits, installation is usually a relatively straightforward process compared to other types of lift kits and can take anywhere from 2 to 6 hours.
The average time needed for installation depends on the complexity of the kit itself, as well as your current level of mechanical knowledge.
If you have basic mechanical skills, then it should be much faster than if you are completely new to this type of work.
Most body lift kits come with comprehensive instructions and helpful diagrams that will make the process easier and quicker.
Generally, most lifts require some degree of cutting, drilling, or modification to your vehicle’s frame and suspension components, so it’s essential to have all the necessary tools before beginning the installation.
When installing a body lift kit you must be sure all necessary hardware is included in the kit itself in order for successful completion.
2. Suspension Lift Kits
Installing a suspension lift kit is generally more complicated than a body lift kit and can take anywhere from 6 to 10 hours, depending on various factors such as experience level and access to tools.
Unlike installing a body lift kit which mostly involves relocating mounting points, suspension lifts typically involve replacing parts like shocks and springs as well as adding spacers in order to increase ride height.
This means there are more components that need to be worked with during installation. Therefore having more mechanical knowledge would be beneficial when attempting this type of job yourself.
If you don’t feel comfortable doing so, then it would probably be wise to seek out an experienced mechanic or automotive shop who knows what they’re doing.
The time required for installing suspension lifts can also depend heavily upon whether you are dealing with an OEM (Original Equipment Manufacturer) or aftermarket parts.
In some cases, aftermarket parts come preassembled, which could save you time, but make sure you have all the necessary hardware before you start.
3. Coilover Lift Kits
Coilover lift kits are by far the most complex type of lifter; these often take between 10-16 hours due to their intensive nature.
Overall, coil overs provide more adjustability than traditional shock absorbers due to their adjustable spring seats. This allows adaptation between track conditions while still providing excellent performance characteristics in both on-road and off-road environments.
Due to their intricate construction coil overs require much more attention when being installed properly. It is essential that each component is properly aligned and tightened correctly otherwise, there could be major issues down the line. For example, sway bar interference or premature suspension wear.
That being said, some coilover designs may come with an adjustable length shaft, making them easier to install without major modifications. When done right, it can help cut down installation time.
How Long Does It Take a Professional to Install a Lift Kit?
Installing a lift kit by a professional usually takes less time than if you attempted to do it yourself. Professionals typically require around 4 hours to set up a standard lift kit in the vehicle. In some cases, this could take longer, depending on the installation’s complexity and the car’s condition.
When taking your vehicle to a garage for installation, you may experience an additional wait time due to there potentially being a queue.
This can add two to three days on top of the standard four that it would take a professional to complete the task.
When planning for lift kit installation by professionals, it is important to factor in additional wait times due to queues and other factors like weather or availability of parts.
You should also consider scheduling an appointment with your local garage or mechanic beforehand to ensure your vehicle will be ready within your specified timeframe.
What’s The Time It Takes to Set Up a Lift Kit Yourself?
If you are installing the lift kit yourself, it may take significantly longer than if a professional were doing it for you.
Depending on your level of expertise with handling tools, how many tools you have available, the type of vehicle you have, and other factors, installing a lift kit could take anywhere from 4 to 10 hours or more.
As numerous steps are involved in the installation process that requires technical know-how and careful execution, this can extend the total time taken even further.
How to Install a Lift Kit at Home Safely?

Installing a new suspension lift kit on your vehicle can be a great way to improve its off-road performance and appearance. Lift kits come 3 in designs, depending on the type of suspension your vehicle has. It’s important to ensure that the make and model of your vehicle match that of the lift kit you’ve purchased.
Step 1: Gather the Required tools and Materials:
Installing a lift kit yourself is an achievable task with the right tools and a little bit of know-how. Before starting, gather the necessary tools and items: floor jack, the car stands, torque wrench, suspension components, hardware, and lubrication.
Step 2: Preparing your Vehicle for Installation
Preparing your vehicle for installation takes some time and is essential. Before you start, park your car on a level surface and engage the parking brake. This will keep your vehicle from moving while you’re working and help ensure everything is done safely.
Start unclamping the negative battery terminal and loosening the lug nuts. Jack up the front of your vehicle to an adequate height for you to get underneath. Jacking points are usually found near each wheel well.
After ensuring that your car is securely held up with car stands or jacks, remove wheels/tires from each corner using a torque wrench or breaker bar.
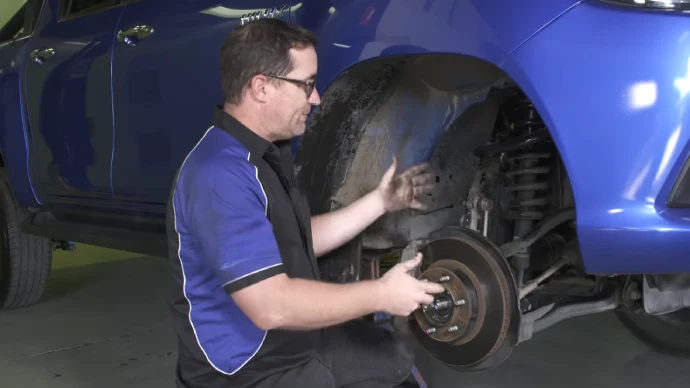
Step 3: Removing the Old Suspension Components
Once all four corners are separated from their wheels/tires, it’s time to remove old suspension kit components like shocks, U-bolts, and control arms as well as springs. If needed, try hammering out any old parts instead of cutting them out if you have replacement parts already acquired.
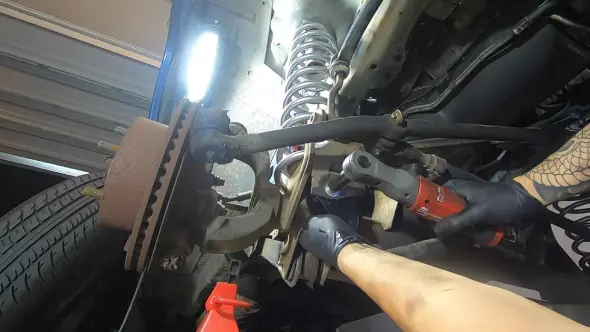
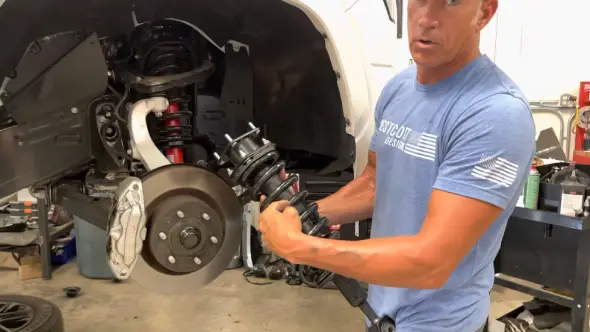
Step 4: Installing the New Suspension Components
With all removed pieces set aside, it’s now time to install new components such as U-bolts. They should be inserted in a vertical position and aligned properly before tightening.
You can attach your new shocks which need to be tightly attached. Depending on the model of shock, some may require additional lubrication. So take caution when attaching them too tightly so as not to damage them with too much force during installation.
Step 5: For the Rear Suspensions
For the rear leaf spring blocks, you’ll need to go through the same process: remove the axle from its leaf spring and install lift blocks or strut spacers to get your desired height gain. After that, you can put your wheels back on.
Step 6: Reinstalling Wheels and Tires
Once that’s done, you can put the wheels back on. Use car stands again when attaching wheels back on for added safety and security measures.
Step 7: Recheck All Components
Once all components are attached and tightened safely according to the instruction manual, it’s time for final checks. Ensure that both sides are level when finished reinstalling wheels/tires. Then re-clamp the negative battery terminal before taking your car off its jack or stands for a testing drive on flat terrain.
Precautions When Installing a Lift Kit at Home
When fitting a lift kit at home, it is important to make sure that the safety stands used are rated for the weight of your vehicle. Safety stands should be placed underneath each side of the vehicle for support and to ensure that it remains level as you are working on it.
It is also important to not rely solely on a floor jack but instead has a jack under each weight point of your vehicle. This will ensure that the weight is distributed evenly and that the vehicle remains stable while you are working on it.
Advantages of Self-Installing a Lift Kit
Self-installing a suspension lift kit can be an intimidating task for any vehicle owner. However, with the right amount of research and patience, installing your own lift kit can result in significant cost savings, as well as a sense of accomplishment.
1. Save Money From Hiring Professionals:
When installing a body lift kit on your vehicle, the cost savings from self-installing can be substantial. Instead of paying labor costs associated with professional installation, you can save money by doing the job yourself.
If you already have some mechanical experience and the necessary tools to do the job, then this could be a great way to save some money and get your vehicle lifted without breaking the bank. When you have access to used parts or secondhand options from another vehicle owner, this would further reduce costs significantly.
2. Save Time When Need Immediate Installation:
Installing a suspension lift kit on your own can be much faster than waiting for an appointment with a professional. Instead of having to wait, you can get the job done quickly and start enjoying the benefits of a lift right away.
This is especially useful if there are other modifications that you want to make but require having more clearance underneath your vehicle first.
Since self-installing requires no waiting period or scheduling conflicts with mechanics, you can work on getting your vehicle lifted at whatever pace works best for you. You can achieve similar results in far less time than what would typically be required had someone else been hired instead.
Disadvantages of Using a Lift Kit for Your Own Installation
There are a number of potential disadvantages when it comes to self-installing a lift kit.
1. Need Some Special Tools:
Installing a lift kit is not a simple task and requires certain tools and knowledge in order for it to be done correctly. Unless you have experience with vehicle repair or have access to some specialized tools, it’s probably best not to attempt self-installing a lift kit.
This can also result in expensive equipment being needed that may not be used again in the future. If you do decide to go down this route, make sure you research what tools are required for your specific vehicle before starting.
2. Can Decrease Ground Clearance:
A key factor when installing any type of lift kit is ensuring you do not reduce your vehicle’s ground clearance too much. Too little ground clearance will make navigating uneven terrain more difficult.
It increases the risk of damaging components underneath your vehicle such as exhaust systems or catalytic converters. Any lift kit installed affects the vehicle’s braking ability which could put both yourself and other road users at risk if left unchecked.
3. Can Decrease Handling:
Inappropriate self-installing of a leveling kit may lead to reduced maneuverability on roads where space is limited or sharp turns are required. Any modifications mustn’t upset the balance between ride height and suspension setup.
You should have adequate handling abilities maintained while still providing good levels of grip when cornering at speed. Larger tires might increase rolling resistance which could decrease fuel efficiency during long journeys if not factored into the overall upgrade plan.
Does Lifting a Truck Affect MPG?
Lifting a truck can have an effect on its fuel economy or reduce mileage. When suspension or performance lifts are installed, they typically increase the height of the tires and add extra weight to the vehicle.
This increases wind resistance, which can make it harder for the engine to propel the vehicle forward. It also adds extra drag, which decreases performance and causes the engine to work harder than usual.
Heavier suspension parts mean that more energy is needed for acceleration and deceleration, further negatively affecting fuel economy. However, smaller body lifts like two inches don’t usually decrease a truck’s MPG significantly.
Do Lift Kits Decrease Value?
Having a lift kit installed on your vehicle can sometimes decrease its value due to restrictions in the buyer pool. But Its added features can make it more desirable to potential buyers.
For instance, if you opt for an aftermarket lift kit with higher-quality shocks and springs, the value could increase over time. It improves performance and greater traction on off-road terrain.
Some suspension kits provide extra space for bigger tires which would be beneficial for those looking to do some off-roading with their vehicles. They could potentially increase the resale value as well.
Experience the Thrill of a Lift Kit Installation
Adding a lift kit is an exciting customization project that can make your vehicle look unique and stand out from the crowd.
It generally takes between two and sixteen hours to install one, depending on several factors, such as the size of your vehicle and the complexity of the installation process.
If you plan ahead and know what to expect when starting this job, you’ll be able to get an accurate timeline for completion so that you can enjoy your new look as soon as possible.
