Last Updated on March 19, 2023
Are you looking to add a little extra clearance and an aggressive look for your RV truck, SUV, or Jeep? If so, a body lift kit might be just what you want. But before tackling this project, you’ll want to know if installing these kits is hard.
Installing a body lift kit isn’t a terribly difficult process. You will need new body mounts, brake line extensions, wiring components and other items specific to your vehicle.
Putting up a lift can take anywhere from a few hours up to a whole day, but having the right tools and following the manufacturer’s instructions is key. So, being armed with the right information and taking steps correctly can make adding a body lift kit much easier than many would expect.
Is a Body Lift Kit Hard To Install: How To Do It?
With a body lift kit, you can add larger tires and even get improved performance from your vehicle. Installing a body lift kit doesn’t have to be complicated. This step-by-step guide will walk you through the process and provide all the information needed for a successful installation.
Step 01: Gather the Necessary Tools
Installing a body lift kit requires specific tools that may vary depending on the vehicle model and the body lift kit installed. Generally, a socket set, jack stands, a floor jack, a drill, and a saw are necessary for installation.
Also, some body lift kits may require additional tools, such as an impact wrench or grinder. Moreover, to ensure a safe installation, it is important to consult with the instructions provided by the manufacturer before beginning any work.
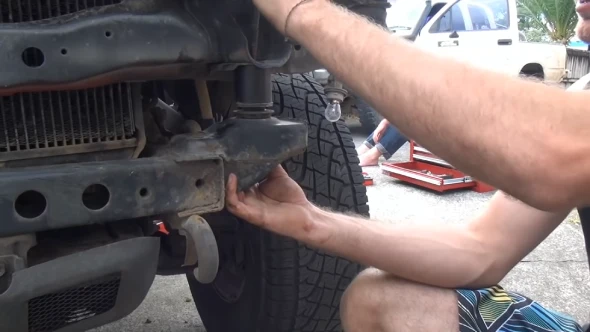
Step 02: Remove the Old Body Mounts
It is often considered one of the most difficult parts of installing a body lift kit. To begin this process safely, raise the vehicle using a floor jack and secure it using jack stands.
Once secure and in place, use a socket set to remove all of the nuts and bolts holding down the old body mounts. Be cautious when removing these components, as they can be fragile or prone to breaking with too much pressure applied.
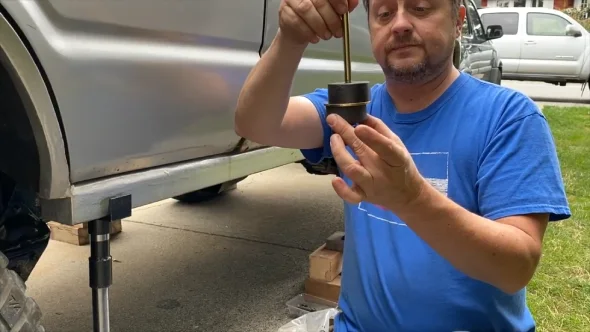
Step 03: Install the New Body Mounts
Once all of the old body mount components have been removed, it is time to install the new ones. Begin by lining up each new mount on top of their corresponding frame locations and securing them in place with bolts and nuts provided by your chosen manufacturer.
Ensure each bolt is properly tightened before moving on to other installation areas. Once secure, double-check all bolts are properly tight before proceeding further with installation methods outlined in your manufacturer’s instructions manual.
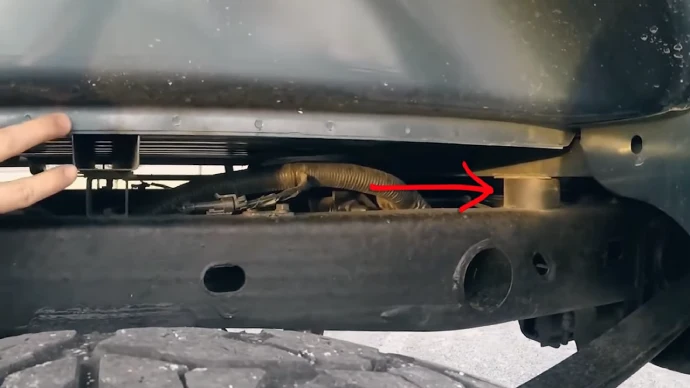
Step 04: Install the New Bumper Brackets
The first step is to identify the type of bumper bracket required for the vehicle’s specific make and model. There are usually two types of bumper brackets: one for the front and one for the rear.
After determining the correct type of bracket, assess whether the existing mounting holes in the vehicle’s frame are suitable for installation. If not, drilling additional holes into the frame may be necessary.
Once all appropriate holes have been drilled, fit and secure the new bumper brackets using bolts, nuts, or self-tapping screws. It is also essential to check that all necessary hardware is included with each bracket and compatible with any additional components, such as spacers or risers.
Step 05: Extend the Steering Column
Extending the steering column may sometimes be necessary when installing a body lift kit on an RV truck, SUV, or Jeep.
To do this correctly, it will be necessary to loosen and remove all bolts connecting the steering column to other parts to gain access to its mounting points on either side of its base plate inside of the engine compartment.
Use a wrench to remove any existing bolts from these mounting points before inserting spacers between them. Once in place, reattach all necessary bolts and lock them into place with washers where indicated before testing. Everything is secure by turning the wheel from side to side several times.
Step 06: Extend The Brake Lines
Jeep due to its raised height from stock settings. It will first be necessary to identify which brake line extension kit type needs to be purchased based on make and model. Use an adjustable wrench to loosen the brake line connections. Take them off and then fit extensions onto both sides.
Tighten them into place using firm pressure. Reconnect the original connections onto the extended lines using pliers, if needed. Finally, fill up any gaps with hydraulic fluid and make sure all connections are sealed securely. Then follow the manufacturer’s instructions to bleed your brakes.
Step 07: Extend the Shifter
Extending the shifter is an important part of installing a body lift kit on RV trucks, SUVs, or Jeeps. Depending on the size of the lift and the height of the new frame, it may be necessary to extend the shifter to reach all gears.
Manufacturer instructions should be followed carefully when extending the shifter. To do this, first locate and remove any mounting bolts for the transmission tunnel cover before loosening and adjusting as needed.
It may also be necessary to adjust linkages or cables associated with the transmission if they have been altered during installation. Once adjusted, check that all components are securely mounted, and everything functions properly before reinstalling any covers or panels.
Step 08: Reconnect All Wiring and Components
Once you’ve installed your body lift kit, it’s time to reconnect all wiring and components, such as battery connections, lights, hoses, and other hardware, to ensure proper fitment and operation of your vehicle.
To do this, inspect all connections to ensure they are clean, free from rust or corrosion, and tightly secured. Next, inspect all wiring harnesses for cuts or damage before reconnecting them in their original positions.
Lastly, check that any hoses are connected correctly before replacing any shields or cover over these components.
Step 09: Test Drive
Before hitting the open road it’s important to take your vehicle out for a test drive after installing a body lift kit on SUVs, RV trucks, or Jeeps. Start off at low speeds around your neighborhood, making sure that there is no knocking from underneath your vehicle’s frame which would indicate an improper installation.
Also, verify that shifting is smooth between all gear ranges and ensure that brakes work as expected. Both when stopping normally as well as in emergency braking scenarios if possible.
After driving slowly, you can increase your speed on roads that are not too busy. Make sure the car is working okay before going back home. Once the car is okay, you can drive like normal on highways.
Do You Need Longer Shocks with a Body Lift?
When installing a body lift kit, it is crucial to consider the shock absorbers. Generally, a body lift does not require longer shocks since the original suspension components are retained. But, a suspension lift might require longer shocks to provide adequate support and cushioning when driving.
It is always best to consult an experienced mechanic or technician before deciding on shock length and body lifts.
Can Any Mechanic Install a Body Lift Kit?
Installing a body lift kit can be done by anyone with the right tools and instructions. But, for those who are not confident in their skills or knowledge about car mechanics, it may be safer to let someone with more experience complete the job.
This ensures that all parts are installed correctly and securely, so there will not be any safety concerns down the line.
Does Body Lift Kits Installation Add Vehicle’s Value?
Body Lift Kits usually do not affect the resale value of cars as long as the modification is done within reason and looks professional. Aftermarket modifications may put off many potential buyers, but some could still appreciate them.
It is especially important if they want something specific regarding customization options. Ultimately, it is up to individual buyers whether they want to pay a premium for vehicle customizations or not.
What is the Difference between Jeep Wrangler Body Lift Vs Lift Kit?
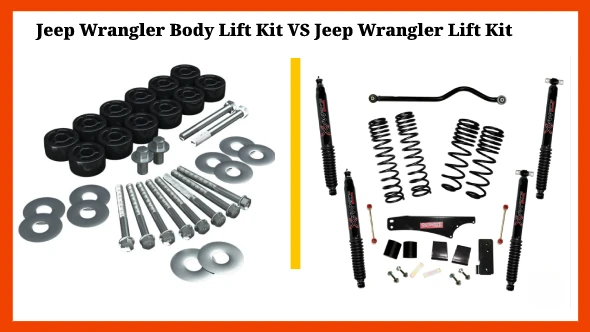
A body lift is economical for gaining ground clearance for larger tires. They are trendy for Jeep Wrangler owners who want to be able to explore more off-road trails. Body lifts raise the body of the vehicle away from the frame, allowing you to fit bigger tires without modifying your suspension.
But, it should be noted that body lifts do not provide as much ground clearance as a suspension lift kit would, meaning that obstacles like rocks and trees may still pose a challenge while driving over them.
Is There a Suzuki Carry DIY Body Lift Kit?
A DIY body lift kit is available on some websites for the Suzuki Carry. This kit includes all the necessary components needed for installation, such as adjustable/fixed spacers and mounting hardware.
It is designed to lift the body of the Suzuki Carry four inches above its standard height while maintaining factory ride quality and providing stability on highways and off-road terrains. The kit also includes detailed instructions so you can easily install it with basic hand tools.
Transform Your Vehicle’s Look with a Body Lift Kit
Installing a body lift kit may sound intimidating, but once you have all the necessary tools, it is actually not that difficult (assuming you have some mechanical experience). It could take several hours depending on your skill level and vehicle make/model.
If properly installed, they do add value to your vehicle while allowing for larger tires and better ground clearance. And although Jeep Wrangler Body Lifts are slightly different from normal lifts kits, either will give your car a much-needed upgrade in appearance.
And, of course, if you don’t feel comfortable tackling this DIY project alone, it’s advisable to consult a professional who can guide you through every step of the way. With their help and guidance, your vehicle will soon have exactly the kind of look that you desire.