Last Updated on May 7, 2023
Installing lift kits comes with several risks and cons besides increasing off-road capabilities, improving road comfort, and creating aesthetic enhancements.
The potential risks include increased rollover risk, changes in poor handling, increased wear-and-tear on kit components, fuel consumption increases, legal restrictions, increasing maintenance costs, and problems driving in low clearance areas.
But these risks can be minimized if you choose high-quality lift kits, install them by professionals with proper instructions, perform regular maintenance, and drive responsibly.
Let’s explore the potential rewards and hazards of installing lift kits and precautions that can be taken during installation for maximum safety.
Are Lift Kits Bad For Trucks: Potentials Risks & Cons
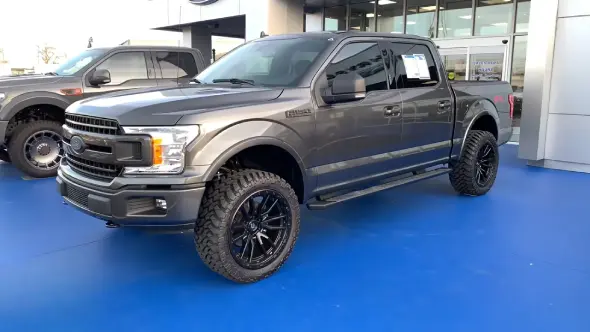
Some potential risks and cons associated with installing lift kits in trucks include rollover risk, poor handling & performance, wear and tear on components, and more.
1. Increased Rollover Risk
Installing lift kits in trucks can have many potential risks, particularly when it comes to increased rollover risk. This is because the higher center of gravity causes the truck to be more prone to tipping or rolling over, especially in certain situations such as sharp turns, panic braking, or high-speed maneuvers.
Installing a lift kit may also change the alignment angles of tires and suspension components, which can further increase the risk of an accident due to reduced stability. Increased wear on the tires due to their raised ride height can also add even more wear and tear, potentially affecting brakes and drivetrain components.
2. Changes in Poor Handling
In addition to increased rollover risk, installing a lift kit also contributes to poor handling. This is because raising a truck’s ride height will require adjustments to its steering, suspension, and other components for it to maintain its safe operation.
These changes can also affect overall ride quality, resulting in poor steering tracking and less precise cornering capabilities. Adjusting alignment angles for these components could alter the way that brakes respond, as well as how other aspects, like traction control, operate.
3. Increased Wear and Tear on Components
Installing a truck lift kit can be a costly undertaking, as the equipment itself can be pricey, and the additional maintenance needs can quickly add up. The extra parts that must be installed, such as shocks, ball joints, and control arms, must all be regularly maintained.
The maintenance ensures they are working correctly and withstanding the additional weight of the truck.
Increasing tire sizes to fit the lifted vehicle can also require shock absorbers that are able to handle greater reaction forces due to this additional load. If these components are not maintained regularly, it can lead to higher repair costs down the road in order to keep everything running efficiently and safely.
4. Increased Fuel Consumption
Installing a lift kit can also lead to increased fuel consumption as the added wind resistance causes more gas waste and reduced fuel efficiency when traveling at high speeds.
This means that running costs can increase significantly over time as more fuel has to be purchased in order to keep the vehicle running smoothly. On top of this, there is also the increased wind noise present while driving at higher speeds due to the added wind resistance.
5. Legal Restrictions:
Depending on where you live, there may be laws or regulations in place which limit how much a lifted truck can raise its height from factory settings. For example, many states limit the maximum height for lifted trucks in order to ensure that other drivers are not unduly obstructed or endangered by large vehicles with excessive ground clearance.
Therefore, it is important to check local laws prior to installing any sort of automotive lift kit on your truck in order to avoid potential legal issues down the line.
6. Higher Maintenance Costs:
Installing a lift kit on your truck is expensive, not only due to the cost of the lift kit itself but also due to the extra maintenance needs that come with it. The additional parts that are required when installing a lift kit require regular maintenance to ensure they are working correctly and as intended.
This includes components such as shocks, ball joints, suspension components, control arms, and other parts which must be maintained regularly in order to prevent premature wear or failure.
The extra weight of a lifted truck can result in increased tire size, as well as a need for shock absorbers that can handle the additional load.
All of these factors can result in higher expenses overall for repairs and replacements if they are not taken care of on a regular basis.
7. Difficulties With Navigating Low Clearance Areas:
A vehicle lift kit on your truck can also make navigating low clearance areas more difficult than it would be with a standard vehicle. This is because the lifted height of your truck could cause it to scrape against objects or get stuck under low-clearance bridges and overhangs if you’re not careful when driving through these areas.
Depending on what lift kit is installed and how high it is raised off the ground, it may also cause difficulties with parking in certain spots or even getting into certain garages. Therefore, it’s important to keep this in mind before installing any sort of lift kit so you know what possible restrictions you may encounter after doing so.
How to Minimize the Risk of Installing Truck Lift Kits
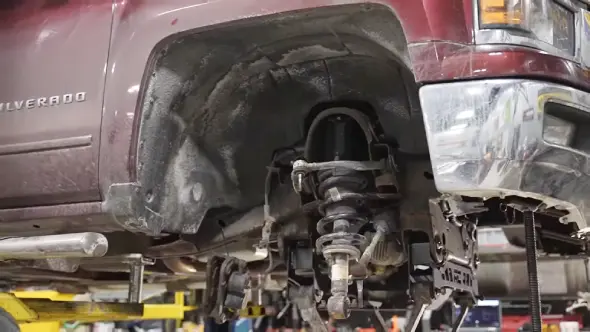
It is important to understand the risks associated with the installation process in order to minimize the chances of something going wrong. Properly researching and installing high-quality parts, following proper installation procedures and regularly maintaining your lift kits are essential for ensuring a safe driving experience.
1. Choose a New and High-Quality Lift Kit:
When selecting a new lift kit for your truck, you must choose one that is both the new latest, and high quality. Poorly made or used kits can be dangerous, so buy one from a reputable retailer or manufacturer offering warranties.
Research the brand and read reviews online before purchasing to ensure you get the best possible product at an affordable price.
2. Install a Lift Kit by a Professional:
Having a professional install, your lift kit is highly recommended in order to minimize the risk of something going wrong during the installation process. While some people may attempt to install their own kit, hiring an experienced technician will help ensure that everything is installed correctly and safely.
3. Follow Proper Installation Procedures:
Once you have chosen a reliable lift kit for your vehicle and had it installed by a professional, you must adhere to all of the manufacturer’s guidelines. Skipping out on steps during installation may result in disastrous consequences while operating the vehicle.
Even minor details can be greatly influential if they are not attended to properly or left out entirely. Therefore, make sure not to overlook any of the necessary instructions to ensure maximum safety on the road.
4. Adjust Other Components as Necessary:
During the DIY installation process of your lift kit, you may need to adjust other components, such as shocks, brakes, steering systems, or tires, for them to work properly with your new setup.
Following manufacturer instructions carefully when performing these adjustments will help keep you safe while on the road. They will also prevent costly repairs or replacements down the line due to improper maintenance or installation techniques.
5. Perform Regular Maintenance:
To ensure optimal performance from the moment of installation and beyond, making regular maintenance a part of your routine is highly recommended. Monitor bolts regularly and ensure safety by vigilantly inspecting shocks, springs, struts, and brakes for signs of wear-and-tear.
If components are in need of replacement, skimping on quality isn’t an option. Invest in the best parts for your lift kit model to ensure optimal protection and care for your valuable asset.
6. Drive Responsibly:
Driving off road is a thrilling experience and is an adrenaline-junkie’s paradise, but it is important to remember to drive responsibly. Drivers should be aware of the behavior that their vehicle displays when modified.
Adjustments to acceleration rates and braking distances can greatly change the way the car handles. It is even more unpredictable than on a regular road, so freedom and fun should never come with a disregard for safety.
Before heading out off-road, drivers should understand how their cars will react to any modifications they have made and adjust their driving style accordingly.
How Can You Put a Lift Kit on a Car?
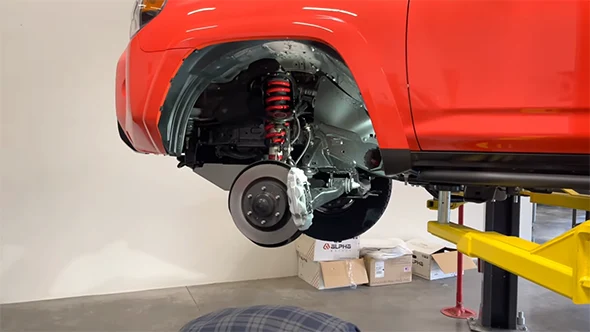
Adding a lift kit to your car can be daunting but achievable with patience and the right tools. Proper preparation and thoughtful action will ensure successful customization. Steps to follow include:
Step 01. Selecting the Right Lift Kit
A. Determine the Type of Car Lift Kit Needed
The first step when selecting a car lift kit is to determine what type of lift kit is needed. Two main types of lift kits are available: body lifts and suspension lifts. Body lifts raise the car’s body off the frame. Suspension lifts raise both the body and frame of the car.
These provide more clearance for larger tires and improved off-road performance. Research each option carefully to decide which is best for your application.
B. Determine the Size of The Car Lift Kit Needed
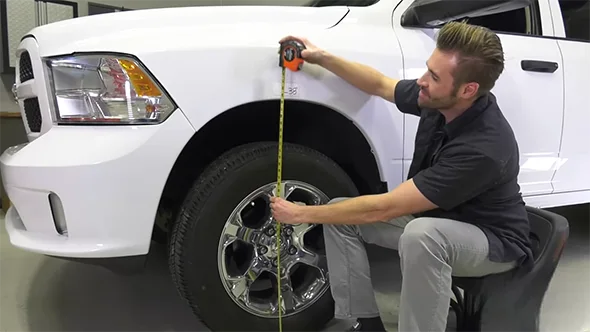
Before purchasing a lift kit, measure the size and dimensions of your car to determine which size lift kit will be appropriate for your needs. Measurements should include the following:
- Wheelbase length.
- Front and rear axle widths.
- Height from ground to fender flares.
- Clearance between body panels and suspension components.
Consider any modifications or accessories, such as bumpers or winches, that may need clearance when selecting a lift kit size.
C. Research Car Lift Kit Manufacturers and Models
Once you have determined what type of car lift kit and size you require, it’s time to begin researching various manufacturers and models. Consider cost, material quality, warranty coverage, customer reviews, installation instructions/difficulty, and availability. Before purchasing a lift kit for the car, examine each factor.
Look for cost-effective deals; review materials used and warranty coverage. Read customer reviews to gauge product performance and ease of installation. Ensure the product is available from a local auto parts store or online retailer.
Step 02. Preparing The Car For Installation
A. Gather Necessary Tools And Materials
Before beginning the installation of a car lift kit on any car, gather all necessary tools and materials beforehand so as not to delay or interrupt installation once it has begun. Standard tools required for most installations include:
- Phillips head or flat head screwdriver
- Torque wrench
- Adjustable jack wrenches
- Sway bars
- Safety glasses
- Work gloves
- Gasket sealant (if applicable)
- Hammer & chisel (if applicable)
Ensure you have all necessary hardware/fasteners, such as bolts, washers, and nuts. Plus, any replacement items, such as bushings or shocks, may be required during installation.
B. Ensure The Car Is Clean And Free Of Detritus
Thoroughly clean exterior and undercarriage areas before beginning a car modification project. This is especially important for projects that include lifting. Neglecting this step can lead to interference from debris and impede progress.
C. Check The Car’s Suspension And Steering Components For Damage Or Wear
With an eye for detail and the right tools, it’s possible to uncover hidden issues with existing suspension components.
Check every component carefully using visual inspection paired with feeler gauges, calipers, and depth gauges.
Keep a watchful lookout for corrosion or any signs of wear that could affect performance down the line.
Step 03. Removing the Old Suspension
A. Jack up the Car
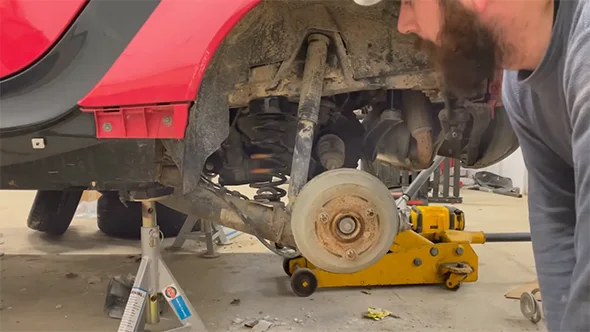
Before removing the old suspension components, lift your car off the ground using a hydraulic car jack. Place jack stands underneath each side of the car for extra support.
Ensure to use two jack stands for added security and stability, as well as to avoid causing any damage to the car’s frame or chassis. Once lifted, ensure all four wheels are off the ground before proceeding further.
B. Remove the Wheels and Tires from the Car
Next, remove all four tires and wheels from your car by loosening and removing each wheel lug nut with a wrench. Place these aside in a safe spot, away from any potential hazards. Keep track of each wheel lug nut to be reinstalled correctly later.
C. Disconnect the Old Car Suspension Components
It is time to disconnect all your car’s suspension components, such as struts, shocks, links, and control arms. Depending on your car type, there may also be other components, like sway bars or stabilizer rods, that need to be disconnected before entirely removing them from your car’s undercarriage.
D. Remove the Old Shocks of the Car
With all your old suspension components now disconnected from your car, it is finally time to remove each shock absorber from its mountings underneath your car’s frame or chassis.
Locate shock absorbers on the car with a reference manual or diagram. Gather necessary tools (wrenches, screwdrivers) depending on mounting hardware. Remove shock absorbers with the correct tools.
Once successfully removed, place these aside until ready for disposal later in this process.
Step 04. Installing The New Lift Kit
A. Install The New Suspension Components
Install new shock absorbers in each car’s frame or chassis corner. Reattach links/control arms accordingly that need replacing. The type and kind of lift kit determines what components need replacing.
To help guarantee secure fixtures, always reference the owner’s manual for install directions and double-check that the proper torque specifications and tightening sequence are followed. After all the pieces are attached, ensure they remain properly secured before calling the job done.
B. Install The New Shocks Of The Car And The Lift Kit
Now it is time to install the lift kit onto the car, which includes raising the body above-average ride height to give extra clearance underneath when driving over taller obstacles such as rocks and boulders. Some kits also come preassembled.
In contrast, others require welding parts together before installing these onto the car and must read through the instructions included beforehand to ensure the correct installation method is followed.
C. Install Any Necessary Brackets Or Spacers For The Lift Kit
Depending on the specific type of lift kit being used, there may need to install additional brackets spacers to increase strength rigidity setup example.
Some cars may require special drop brackets and lower rear mounts to allow adjustability control arm length, others may include top plates to reinforce axle housings, thus improving overall performance.
Whatever the case, read instructions thoroughly and understand requirements before beginning work.
D. Install The New Wheels And Tires
Finally, it’s time to put those wheels back onto their respective positions, doing so quickly. A securely important factor here is always to remember to follow the torque specifications provided by the manufacturer, usually printed directly inside the wheel package label.
Also, remember to check the air pressure of each tire after finishing, ensuring everything is an excellent tight result.
Step 05. Adjusting the Alignment
A. Align the Car’s Wheels to Compensate for the Lift
Installing a lift kit on your car is a task that should be taken seriously. One of the most critical steps is ensuring that your car’s wheels are correctly aligned so that you don’t experience any issues with the ride quality or handling afterward.
To do this, you must first locate your car’s alignment specs to determine what measurements need to be adjusted. Once you have all of these measurements, you must jack up each wheel individually and use an adjustable wrench or other tools to adjust the angles according to your car’s specifications.
B. Test Drive the Car to Check for Any Issues
After adjusting the angles of each wheel. Go for a test drive to ensure that everything feels good and that there are no problems with how your car handles or rides.
During this test drive, pay special attention to how well your brakes are working and whether there is any pulling when turning corners or going over bumps. If anything seems off, return your vehicle to a shop for further inspection as soon as possible.
Advantages of Installing Vehicle Lift Kits in Trucks
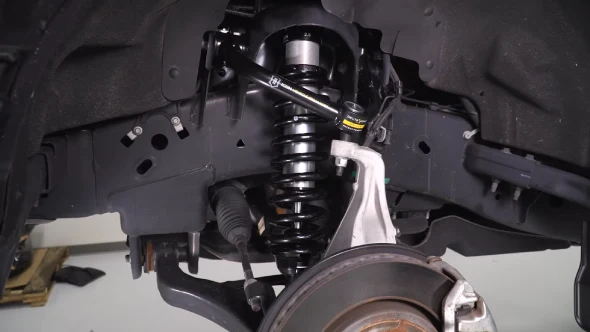
Besides some risks, lift kits can help boost the performance and comfort of your truck, as well as make it look more rugged and customized.
1. Increased Off-Road Capabilities
One of the primary benefits of installing a lift kit in a truck is increased off-road capabilities. With bigger tires and modified suspension, trucks that have lift kits installed will have greater ground clearance, allowing them to traverse difficult terrains more easily than they would before.
With these modifications, trucks can handle deep water crossings without getting stuck. In addition, larger tires give greater traction when driving on slippery surfaces due to their increased grip on the ground.
2. Improved Road Comfort
Installing a lift kit provides significant improvements in terms of road comfort too. By adjusting the suspension settings, drivers will get increased cushioning when traveling over rough roads or uneven terrain, resulting in less fatigue and improved ride quality overall.
A greater wheelbase provides more stability on curves and turns alike. Tire sidewall heights can also be adjusted to increase traction on slippery surfaces such as snow and ice by providing greater surface contact between the tire and the road surface.
Modifications like these allow drivers of lifted trucks to experience smoother rides over all kinds of roads, making them ideal for city commutes too.
3. Aesthetic Enhancements
Using a lift kit for your truck can drastically elevate its appearance and performance benefits. With the added height, larger tires can be mounted, providing an aggressive look and extra cornering grip, particularly on off-road terrains or in unpredictable weather conditions.
Custom paint jobs and body modifications, such as adding hood scoops or new body lift kits, become much easier when the truck is lifted off the ground precisely. Ultimately, a lift kit makes for a practical choice if you want to upgrade your truck’s outlook and capability.
Can A Lift Kit Be Combined With Larger Tires?
A lift kit can be combined with larger tires to provide more ground clearance and a better look. Know that there are some considerations you should make before making this decision.
Consider the weight of the bigger tires and how much load they will put on your engine. This could affect your vehicle’s performance if not taken into account. Adjust torsion keys or fender liners to fit the larger tires without a lift kit.
If you decide to use a lift kit with bigger tires, ensure all components are compatible and properly installed for optimal performance.
Overall, combining a lift kit with larger tires can effectively improve ground clearance and enhance your truck’s look. Just ensure you take all necessary precautions beforehand to ensure safety and optimal performance.
How Long Will a Lift Kit Last?
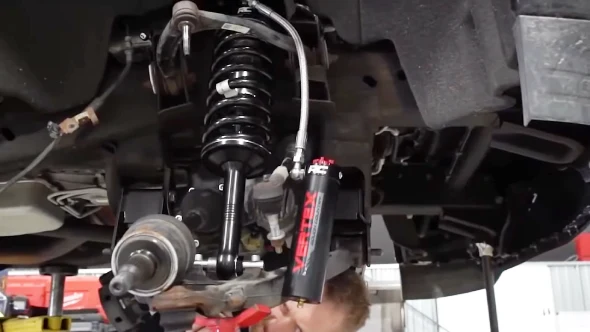
A lift kit typically lasts between 8 and 10 years when installed and maintained properly. The exact lifespan of a lift kit can depend on the type of lift kit purchased such as body lift kits and suspension lift kits, the amount of wear it receives, and the quality of its installation.
For example, lifts with high-quality suspension components may last longer than those with cheaper parts. Some off-roading activities can cause additional wear and tear on your lift kit, causing it to last for a shorter period of time than average.
Will a 2 Inch Lift Hurt My Truck?
Installing a two inch lift on an appropriately sized pickup truck will not cause any harm or long-term damage as long as it’s done correctly. Larger lifts such as 3+ inches may cause more stress on certain parts of your vehicle such as axles if driven over rough terrain or large bumps at high speeds.
Installing 2 Inch suspension or body lift kit involves ensuring proper alignment, and regularly checking all the components after lifting.
Does a Lift Kit Waste More Gas?
Installing a body or suspension lift kit can potentially waste more gas due to increased wind resistance when driving at higher speeds. This is because larger/taller vehicles create more drag when traveling along flat surfaces due to their shape.
Modifications such as bigger tires may require more energy from the engine in order to turn them. It can decrease fuel economy when accelerating or passing other vehicles on the highway.
This depends largely on the size/type of tire used. Lower profile tires (shorter sidewalls) generally have less wind resistance than taller ones which can save fuel over time.
Is It Better to Lift or Drop a Truck?
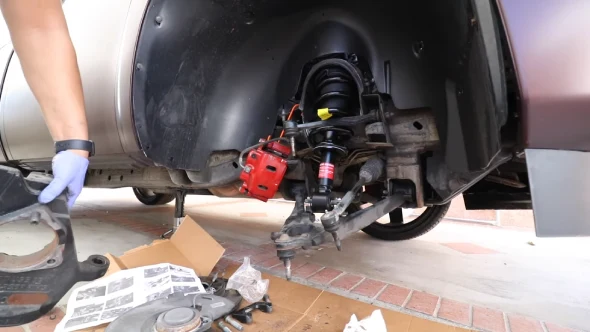
If you plan on using your truck solely for street use, then dropping it would be preferable. But if you plan on taking it off-roading, then lifting it would be beneficial due to its increased clearance capabilities.
Trucks that are lifted are usually better suited for off-roading activities such as mudding or rock climbing, where higher clearance is required.
Dropping one’s truck usually has aesthetic value in mind. It often involves lowering both ride height and center gravity for improved handling characteristics around corners and tight turns.
Conquer Off-Road Trails Safely With Truck Lift Kits
Boosting your truck with a well-crafted lift kit can bring exciting benefits, but it’s important to be mindful of the potential risks. Quality kits are available to set up your vehicle and ensure optimal suspension performance so you get all the advantages without any unnecessary danger.
Proper installation also helps to minimize any risk while ensuring the structural integrity of the truck remains intact. Regular inspections and maintenance can guarantee a worry-free ride both on and off road.
With this preparation and understanding, a lift kit can give drivers an exciting way to safely explore off-road trails or improve their road comfort and aesthetic appeal.
