Last Updated on April 17, 2023
Are you looking to remove a lifting kit from your Jeep? Removing a lift kit can be complex and time-consuming, whether you want to restore it to factory specifications or make room for larger tires. Understanding what is involved is essential to complete the task safely and correctly.
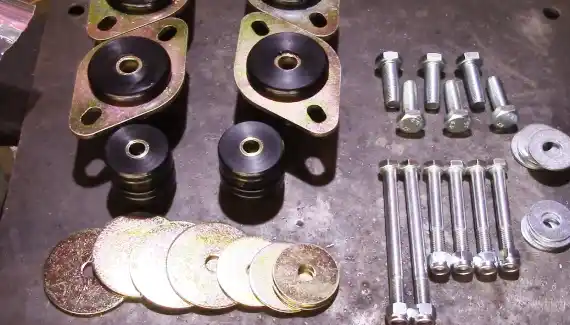
The process has many steps, from gathering the necessary tools and materials to securing components with zip ties or wire. All the remaining steps in the lift kit removal process have clearly been instructed throughout the article.
To safely and effectively remove the lift kit from your Jeep, we will provide all of the necessary tools and materials needed, as well as step-by-step instructions. Through thorough guidance, let us show you how to properly execute this complex process with peace of mind.
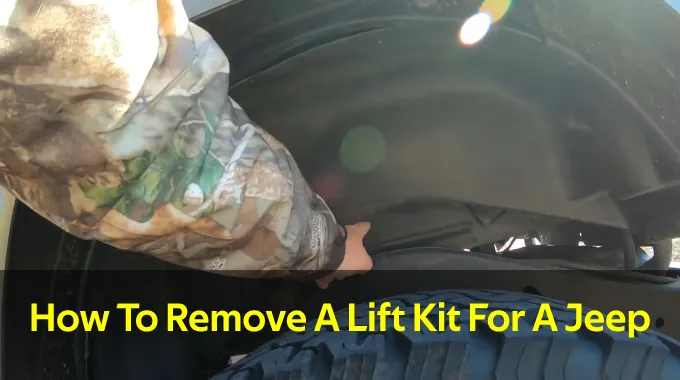
How To Remove A Lift Kit For A Jeep: DIY Steps
Removing Jeep lift kits can be a complicated process. It involves reversing the process of installing one. But by following this step-by-step guide with instructions, you can safely and effectively uninstall your lift kit:
Step 01: Preparation
i. Gather the Necessary Tools and Materials
When preparing to drag a lift kit from your jeep, ensure you have all the necessary tools and materials for the job.
This may include various wrenches and sockets, pliers, screwdrivers, jack stands, jack, pry bar, drill or impact driver, clamps, rust preventative spray, and other parts or accessories included when the lift kit was installed.
Ensure you have enough space around the jeep to set up your work area. If there are any obstacles to where you need to work, such as trees or rocks, moving them out of the way before beginning would be helpful.
ii. Park the Jeep in a Safe and Level Area
Once all necessary tools have been gathered, park the jeep in a secure area. This should be a relatively level area (or as close as possible) so that any weight placed on certain jeep parts will be distributed evenly throughout the frame.
Use wheel chocks at your jeep’s front and back wheels for added safety during this process, and put blocks behind each tire for extra stability when jacking up the jeep later on in this project.
All other jeeps should be parked away from the working area so as not to risk contact with moving components as they are being removed during the removal process.
iii. Disconnect the Battery
The next step is disconnecting its battery. The battery must be disconnected before beginning any work under the hood or frame to reduce risks associated with electrical shorts caused by test probing wires while working underneath the chassis.
To do this properly, locate the battery under the hood. Then disconnect the negative battery terminal by loosening the nut and holding the cable onto the terminal using an appropriate-size wrench. Then pull the cable off the post using the same wrench or pliers.
Once disconnected securely, tape the end of the cable away from the post using electrical tape if desired but not necessary.
Then repeat the same procedure with the positive battery cable until both sides are disconnected from the terminals and lifted out of the way completely before beginning work on the frame/undercarriage.
Step 02. Remove the Jeep Wheels
i: Loosen Lug Nuts
The following step in removing the wheels from a jeep is to loosen the lug nuts. This is done using an appropriate size lug wrench, which should be included with the jeep or purchased separately at most automotive parts stores.
Place the wrench over the top of each lug nut and turn counterclockwise until it begins to come loose. Ensure all lug nuts have been loosened before attempting to jack up the jeep. Once they have been reduced, you can move on to the next step.
ii: Lift the Jeep with a Jack
Once all of the lug nuts have been loosened, it’s time to lift up your jeep using a floor jack. This can be done by placing the jack underneath your jeep’s frame near one of its wheels and then lifting it up until that wheel is off the ground.
Place a piece of wood or metal underneath your jack so as not to damage any components beneath your jeep when raising it. Remember that you should never lift more than two inches off the ground at once when lifting a jeep.
iii: Remove The Wheels
To remove your wheels from your jeep, remove each wheel one at a time while not dropping any components on or around them, such as brake calipers or other attached parts.
Begin by unscrewing each lug nut from its corresponding wheel using either an impact gun or hand tools. Once all five lug nuts have been removed from their respective wheels, carefully pull each wheel off and set it aside for disposal or reuse elsewhere (if applicable).
Step 03: Disconnect Brake Lines and ABS Sensors
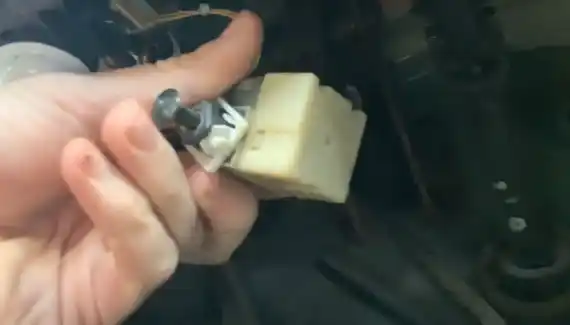
i: Locate and Disconnect ABS Sensors and Brake Lines
When disconnecting brake lines and ABS sensors from your Jeep, be very cautious and aware of the tools you are using since they can easily damage the system.
- First, locate all of the connected brake lines and ABS sensors. This usually includes a brake fluid reservoir, a master cylinder, an ABS control module, and hardlines.
Once you have identified these components, note where each is connected. You may need to use a flashlight or other light source to see what’s going on properly.
- Next, you must prepare for disconnection by gathering tools, such as wrenches or screwdrivers, to loosen clamps or bolts. Depending on what type of connection is being made, a special tool may also be needed.
Have all necessary items close at hand before starting any disconnections. Remove any clamps or bolts securing the brake line or ABS sensor one at a time with your appropriate tools after everything has been identified and prepped.
Once the first clamp or bolt has been disconnected, do this on each remaining component until all brake lines and ABS sensors have been removed from your Jeep.
ii: Secure with Zip Ties or Wire
After successfully disconnecting all of the ABS sensors and brake lines from your Jeep, properly secure them. So they don’t become entangled in other components during the removal.
To do this correctly, find either zip ties or just regular wire that can be used for wrapping around the hoses/wires securely without putting too much strain on them, which could cause damage to their connection points when re-installing in the future.
You may also want to consider using protective sleeves over wires if they come into contact with each other while traveling out of your jeep. This can reduce damage due to friction while moving them around later on down the line.
Once all zip ties or wires have been placed in their proper locations, double-check that none are loose before continuing with whatever project you were working on.
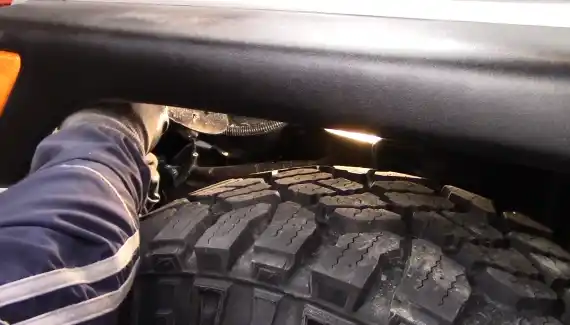
Step 04: Remove Shocks and Sway-Bar Links
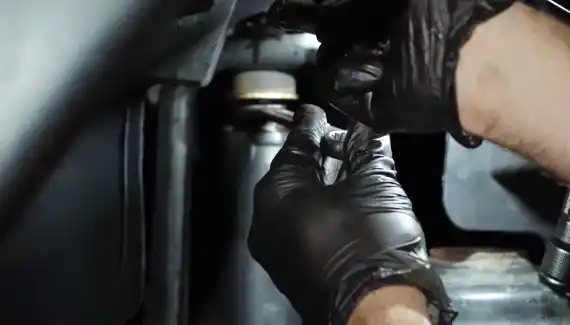
i: Locate and Remove Sway-Bar Links and Shocks
Before removing the shocks and sway bar links from your Jeep, you must first locate them. The shocks are typically located along the sides of the frame near the wheels. You should be able to identify them by their rubber-like appearance.
Some Jeeps will also have a metal plate covering them for added protection against debris or moisture. Once you have identified the shocks, disconnect both shock absorbers simultaneously. This will prevent any twisting or binding of other suspension components while being removed.
To disconnect these components, use a ratchet or wrench to loosen the nut securing them in place until it can be pulled free from its mountings.
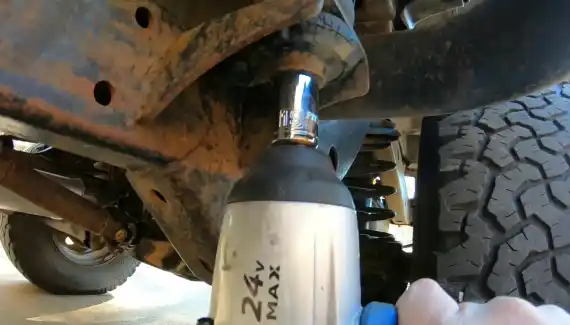
ii: Use a Breaker Bar or Impact Wrench if Necessary
Once all the nuts have been loosened and removed, use either an impact wrench or a breaker bar to remove all bolts securing the shocks.
A breaker bar is a specialized tool for applications requiring large amounts of torque. It is used to loosen fasteners that would be difficult to manage with a regular ratchet or wrench set.
An impact wrench is designed to break tight bolts quickly and with minimal strain on the hands or wrists. It will allow you to break stubborn bolts without straining their hands or wrists by applying high force quickly.
When using either of these tools, take extra care not to over-tighten any fasteners, as this could cause thread damage, leading to further problems if not appropriately addressed.
Step 05: Remove Spacers and Springs
i. Locate and Remove Springs and Spacers from a Jeep
Locate all springs and spacers near axles, wheel wells, and underneath frames. Remove any nuts, bolts, and other fasteners securing them in place, paying close attention to how they were configured. Pry off any attached blocks with a pry bar (if necessary) and remove each spacer plate.
Dispose of springs and spacers properly, being mindful of oil or grease stains associated with them. Remember additional components, such as shock absorbers or upper control arms, before persisting with the removal process.
ii. Use A Coil Spring Compressor Tool To Remove Springs From A Jeep
The coil spring compressor tool is essential for safely and efficiently removing springs from a Jeep. Always refer to the instruction manual for specific setup and operation instructions. Compression should be adjusted until tension is released between the two points and the clamps secured.
Gradually increase the pressure until clamps can slip off during removal. All components should be loosened again before moving on to other tasks.
Step 06: Remove Control-Arms and Track-Bar
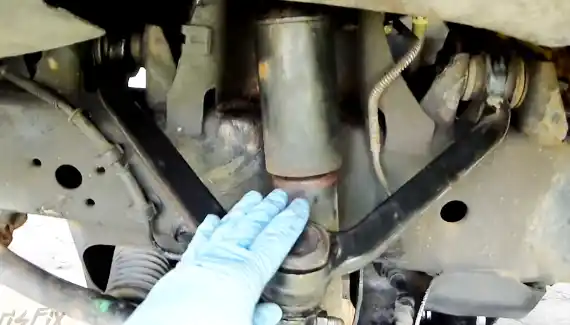
i: Remove the Track-Bar of the Lift Kit from the Jeep
Lift kits should be removed from your Jeep by removing the track bar. Take your time and follow the steps carefully to remove this component. Put something underneath your jeep to prevent it from rolling away once it’s on a flat surface. Rather than just using the jack, use jack stands.
For extra stability and safety, use wheel chocks. The track bar must be removed once everything is secure. Look for two bolts on each end of the track bar on either side of the axle tube. Loosen each bolt by hand or with a ratchet wrench (depending on how stuck they are).
In case they are particularly stubborn or difficult to turn, penetrating oil may help. Whenever in doubt, consult a mechanic experienced in removing lift kits.
ii: Remove Control Arms From Your Jeep’s Suspension System
Identify the type of control arms in the Jeep model before beginning the removal process. Disconnect both lower and upper control arms, noting each mounting point. Unscrew all associated bolts with regular wrenches or power tools.
Lubricate parts if necessary to aid separation. Use dedicated tools such as ball joint separators or pickle forks for extra leverage.
Step 07: Reinstall Stock Components in Reverse Order
Reinstall stock components of Jeep in reverse order of disassembly. Securely jack up the car and put on jack stands/ramps to have 360-degree access. Reattach wheels/tires, shocks/struts, brake lines, and control arms from the bottom up.
Tighten all lug nuts before moving on to other components. Reinstall skid bars and brackets and tighten them with a torque wrench for secure operation. Reconnect drivetrain components such as transfer cases, driveshafts, and axles tightly and add fluids if necessary.
Lower the car from stands/ramps and test out for squeaking or rattling noises that could indicate incorrect installation.
Step 08: Check Alignment and Suspension
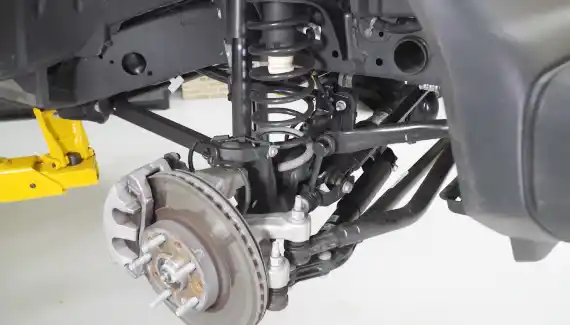
After dragging a lift kit off a Jeep, check the alignment and suspension of the jeep. This should include an in-depth inspection of the steering linkage, ball joints, tie rod ends, idler arms, and other suspension components to ensure they all function as intended.
Check the wheel alignment at this stage to ensure it is properly adjusted before further work is done on the jeep. Make any necessary adjustments before removing any components associated with the lift kit. If any part of these systems appears damaged or worn out, it may be necessary to replace them before continuing with the removal process.
Step 09: Make Necessary Adjustments
Once any necessary pre-removal checks have been completed and any damage or excessive wear has been identified and taken care of, it can be time to make any necessary adjustments to remove the lift kit. This may include loosening wheel lug nuts and adjusting brake caliper placement.
A floor jack may need to be used to raise or lower certain parts as needed for them to fit properly during assembly or disassembly procedures. Proper safety precautions should always be taken while making these adjustments to prevent injury or damage caused by incorrect use or installation.
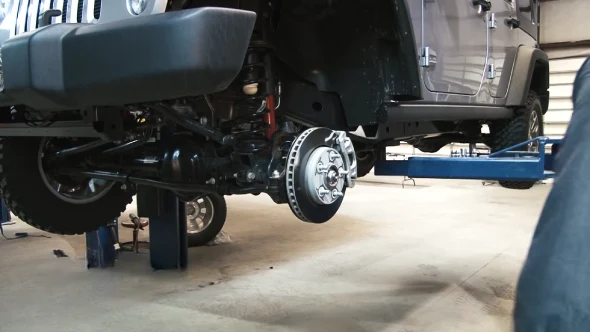
Step 10: Test Drive the Jeep
Once the components of lifting a Jeep have been removed and reassembled correctly, perform a test drive before returning the jeep to regular service.
Every performance aspect should be evaluated during this test drive, including braking power, acceleration speed, cornering ability, and handling capabilities under different conditions. This could be wet roads or offroading surfaces.
You may need to adjust if anything seems inconsistent until everything feels smooth again. A dangerous handling issue can be triggered down the road if something is overlooked during this process.
Does Lifting a Jeep Cause Problems?
Lifting a Jeep can cause various problems, from the increased center of gravity to brake and steering system issues. Here are some of the most common issues associated with raising a Jeep:
Increased Center of Gravity
Lifting a Jeep raises its center of gravity, making it more prone to tipping over during sharp turns or sudden maneuvers. This can be particularly dangerous when driving on uneven terrain or steep inclines.
Changes to Suspension Geometry
Lifting a Jeep alters the suspension geometry, which can cause issues such as reduced handling and stability, increased wear and tear on suspension components, and decreased ride comfort. This can lead to a bumpy, uncomfortable ride and may increase the risk of mechanical failure.
Driveline Vibrations
Lifting a Jeep can cause driveline vibrations, which occur when the angles between the transmission, driveshaft, and axles are changed. These vibrations can cause damage to driveline components, resulting in expensive repairs.
Brake and Steering Issues
Lifting a Jeep can affect the brake and steering systems, designed to work within a certain range of motion. If these systems are pushed beyond their limits, they may become less effective or fail altogether. This can result in reduced stopping power, loss of control, and increased risk of accidents.
Legal Issues
Depending on where you live, lifting a Jeep beyond a certain height may be illegal. In some states or provinces, vehicles that exceed certain height limits are not road-legal and cannot be driven on public roads.
How Does Removing a Lift Kit From A Truck Can Cost Expenses/Money?
Eliminating a lift kit may be costly, depending on the added aftermarket suspension type. If cutting was done to the frame or other components, it might be necessary to replace those parts to rejuvenate the truck to its initial state.
If any specialized tools were used during the installation process, they would need to be purchased to remove the lift kit safely. This can require specialized tools and labor, which can add up quickly.
When removing a lift kit, labor costs can also add up quickly, requiring knowledge and experience with truck suspension systems. Any other modifications were made during the installation of the lift kit, such as larger tires or wheels.
Those will also need to be removed and replaced with stock components which can add additional costs. Leaving the lift kit installed, in some cases, maybe more cost-effective than removing it. This is especially true if you plan on reselling your truck and want to keep the value of your build intact.
Overall, pulling out a lift kit is expensive due to labor costs and potential parts replacements. Weigh all of your options before deciding whether or not you should take off your lift kit.
Remove A Lift Kit From Trucks: Necessity
A lift kit can be removed from a truck for several reasons. Perhaps the truck’s owner wants to reset the truck to its actual height, or they may be experiencing handling problems or other issues with the lift kit.
The owner may want to sell the truck, and the new buyer does not want a lifted truck. Regardless of the reason, removing a lift kit can be a complex and time-consuming process.
Still, it is essential to follow the proper procedures to ensure the truck’s and its passengers’ safety. Below are some of the necessities for removing a truck lift kit.
01. To Restore The Truck To Its Factory Specifications
Removing a lift kit can rest a truck to its manufacturer specifications. A lift kit is an aftermarket modification that raises the truck’s height, usually by adding spacers between the body and frame or suspension components. Removing the lift kit will lower the truck’s original height, restoring it to its factory specifications.
Remove a lift kit using the correct tools. Ensure you have all the necessary parts and tools before beginning, such as jack stands, wrenches, and sockets. Follow instructions carefully when taking apart any components.
Once everything is removed, you can reinstall the original parts or purchase new ones. Restoring a truck to its factory specifications can be time-consuming but rewarding work.
It requires patience and attention to detail to ensure everything is back together correctly and safely. With some hard work and dedication, you can restore your truck back to its original condition.
02. To Reduce Fuel Consumption
When a lift kit is removed from a truck, it can lower the truck’s fuel consumption by lowering the truck’s weight and improving aerodynamics. Reducing the truck’s weight lowers its center of gravity, allowing it to move more efficiently through air resistance.
Overinflated tires due to extra weight reduce tire pressure and decrease fuel economy. Improved aerodynamics from removing a lift kit helps with gas mileage as it influences how efficiently your truck moves through air resistance at higher speeds.
Lower ground clearance on your truck due to the removal of the lift kit means less air will be pushed up under the chassis when driving at high speeds, thus increasing fuel efficiency.
03. To Improve Handling
Removing a lift kit from your truck can improve its handling in several ways. First, it will reduce the amount of body roll when cornering or taking sharp turns. This is because the suspension will better absorb the bumps and dips in the road, resulting in a smoother ride.
Second, it will reduce the tension on your tires by making them less likely to slip or skid when driving on wet or icy roads.
Finally, it will reduce the strain on your truck’s suspension components, as they won’t have to work as hard to stabilize the truck. All these factors combined can make for a much safer and more enjoyable driving experience.
04. To Improve the Stability
Removing a lift kit from the truck can be beneficial in many ways, not least of which is increased stability. By lowering the center of gravity, the chance of tipping or rolling increases dramatically.
Likewise, improved traction and contact with the road surface decrease the chances of tires slipping in adverse conditions. Reducing a truck’s height improves performance on potholes and other uneven surfaces since it allows for smoother handling due to better shock absorption on rough roads.
The improved stability and suspension make driving a safer experience by reducing driver fatigue and improving overall control when maneuvering at speed or in poor weather.
05. To Improve A Smoother Ride Quality
removing the lift kit can improve ride quality. The higher the lift, the more strain it puts on your suspension system and tires. This can lead to a rougher ride and increased wear on your tires. By reducing the truck height, you can reduce the strain on your tires and suspension system, resulting in a smoother ride.
Ensure that all components are properly adjusted for the new height during the removal of the truck lift kit. This includes adjusting your wheels’ camber and toe angles and ensuring that any aftermarket parts are correctly installed. Replacing worn-out shocks or springs with new ones can also help improve ride quality.
By removing a lift kit and properly adjusting all components for the new height, you can significantly improve the ride quality and make for a much smoother ride.
06. To Maintain Off-Road Capabilities
Depending on the type of aftermarket suspension added to the build and how much cutting was done, removing a lift kit from trucks can maintain off-road capabilities.
For example, if you have an adjustable suspension system already installed, you can simply adjust it back to stock height without removing any parts. If you have a fixed suspension system, you will need to remove the parts and replace them with stock components to return your truck to its initial height.
When removing a lift kit, consider the components used in the installation process. If cotter pins or ball joints are involved, they must be removed first before any other components can be taken out.
If blocks or spacers were used in the rear axle, these must also be replaced with stock components for your truck to remain capable off-road.
Consider what kind of tires were installed when installing a lift kit and when removing it. If larger tires were used during installation, they might need to be downsized when returning your truck to its original altitude to maintain its off-road capabilities.
07. To Preserve Breaks And Other Components
Removing a lift kit can help preserve breaks and other components. When you install a lift kit, it changes the angle of the suspension and drivetrain components, which can put additional strain on them. By removing the lift kit, you return the truck to its original factory settings, reducing the stress on these parts.
When you remove a lift kit, you should inspect all affected components for damage and replace any damaged or worn out. When removing a lift kit that’s attached to your truck, follow the instructions carefully and use the right tools for each step.
You must disconnect any aftermarket suspension components, such as shocks or struts. Remove both front wheels, disconnect the ABS sensor wire if applicable, loosen the ball joint nut but leave five threads, and use a ball joint separator to separate the ball joint from its housing.
Remove split pins from bottom ball joints with wire cutters and then reinstall stock parts in reverse order.
08. To Reduce Stress On Suspension Components
Removing a lift kit can reduce stress on suspension components by allowing the truck to return to its initial factory specifications. This means that the suspension components will work as designed without any additional strain caused by the lift kit.
When a lift kit is installed, it can cause increased abuse of the suspension components due to the added weight and height of the truck. By removing it, you can help ensure that your suspension components remain in good condition for longer.
Emptying a lift kit can also improve your truck’s overall performance. With less strain on the suspension components, your truck will be able to handle better and provide a smoother ride.
Plan on taking your truck off-road or driving in rough terrain. You’ll enjoy improved handling and performance by reducing stress on the suspension components while maintaining safety standards.
09. Easier Entry And Exit
Removing a lift kit can make it significantly easier to enter and exit as the step-in height is reduced. This can be helpful, especially for those with mobility issues or older drivers who may require extra assistance entering and exiting the truck.
When the lift kit is removed, the truck can return to its original factory specifications, which lowers the step-in height by several inches, making it much more accessible. This also allows drivers to remain closer to the ground when they enter and exit the truck, providing greater stability and support.
Removing a lift kit can improve visibility while driving as there is less obstruction between the driver and their surroundings when compared to having a lifted truck. If you intend to remove a lift kit attached to your truck, ensure that all components have been properly disconnected to ensure safety is not compromised.
Suspension modifications are required to reduce potential issues after a lift has been installed or removed, such as an uneven ride or impaired turn handling.
Removing a lift kit can greatly improve accessibility for all passengers by reducing the step-in height while also providing greater stability and improved visibility.
How Long Does It Take To Remove a Lift Kit from a Jeep?
Pulling out the lift kit is likely to take 4 to 8 hours, depending on various factors. A lift kit’s type, the level of expertise of the person performing the work, and the available tools determine how long it will take.
For instance, if an experienced mechanic is working on the job with all the right tools, they may be able to complete it faster than someone just starting or doesn’t have access to some specialized tools. Additionally, the size of the lift kit and its complexity may also affect how long it takes.
The type of lift kit being removed also affects how quickly it can be done. Removing it with an older model and a less complex suspension system may take less time. More advanced systems with more components can significantly prolong the process.
Additionally, if you do not have access to professional-grade tools or lack experience in this area, you should expect that removing your lift kit could take longer than average.
With proper planning and preparation, terminating a lift kit on a Jeep should take only 4-8 hours for most people. Taking longer may be necessary depending on what type of lift kit you have installed, as well as your own skillset and access to necessary tools.
Do Lift Kits Devalue Trucks?
Lift kits can have positive and negative effects on the value of a truck. On the one hand, they can improve the performance, look, and off-roading capabilities of a truck.
On the other hand, if not installed properly or with quality parts, lift kits can cause problems such as increased wear and tear on the suspension system and decreased fuel efficiency. When considering whether a lift kit will devalue a truck, consider how it was installed and what type of parts were used.
If done correctly with quality parts, a lift kit should not significantly decrease the value of a truck. However, if done improperly or with inferior parts, it could lead to costly repairs down the road that could negatively impact the truck’s value.
Overall, lift kits can be beneficial for trucks when done correctly with quality parts. Weigh all factors before making any decisions about installing a lift kit to ensure that it does not negatively affect your truck’s value in the long run.
Wrapping Up: Easy Steps to Effortlessly Revert Your Jeep to Its Original State
After following all of the steps outlined in this guide on removing lift kits from Jeep, you should be well on your way toward completing this job. Before driving it off, ensure you have checked its alignment and made any other necessary adjustments.
If any further questions arise while working on this project, please leave us an inquiry below. We’d be more than happy to help. With proper safety precautions taken during installation and these helpful tips, you should have no trouble getting rid of your Jeep lift kit.