Last Updated on April 12, 2023
Are you familiar with the process of setting a tire bead?
A lot of people don’t know how to do this, but it’s actually not that difficult. You can do it like a pro with the right tools and some practice.
We’ll guide you through everything you need to know about setting a tire bead in this guide. We’ll cover the tools you need, the process, and some tips to make it easier. Read on to learn how to set a tire bead like a pro!
Is it Necessary to Set a Tire Bead?
A tire bead is the part of the tire that sits on the rim of the wheel. It’s important to set the bead properly because the tire can come off the wheel if it’s not secured correctly.
Also, if the bead is not set correctly, the tire can leak air. This is why it’s important to know how to do it properly.
There are a few ways to set a tire bead: using a compressor, sealant, or tube. This guide will lead you how to set a tire bead using a compressor.
Instructions on How to Set a Tire Bead
Many people are intimidated by the process of setting a tire bead. But with a little practice, it’s not difficult at all. Here are the instructions:
What tools do I need?
To set a tire bead with a compressor, you’ll need the following tools:
- Compressor
- Tire iron
- Tire jack
- Spare tire
- Tire chucks
- Gloves
- Safety goggles
Step 1: Now that you have the tools, let’s guide you through setting the bead. First, make sure your tire is clean and free of debris. You don’t want anything getting in the way while you’re setting the bead.
Step 2: Next, loosen the lug nuts on the spare tire and take the wheel off.
Step 3: Position the tire so that the valve stem is facing up. This will make it easier to inflate later on. Valve stem caps are also important to keep in place so that no dirt or debris gets into the valve.
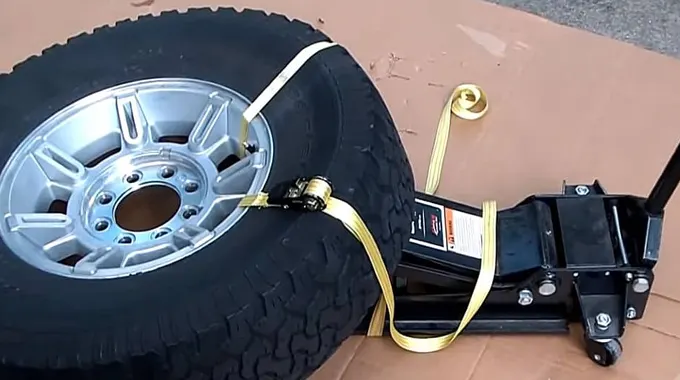
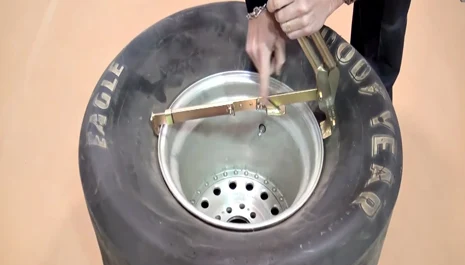
Step 4: Now, attach the tire iron to the spare tire and place it inside the wheel’s rim. Be careful not to pinch your fingers!
Step 5: Use the tire iron to pry the tire bead away from the rim of the wheel. You’ll need to do this on both sides of the tire.
Step 6: After removing the tire bead from the rim, use the tire jack to lift the spare tire over the rim.
Step 7: Put on your gloves and safety goggles. You don’t want anything bouncing back and hitting you in the face!
Step 8: Hook up the compressor to the tire chuck and start inflating the tire. You’ll need to inflate it to about 30 psi.
Step 9: Once the tire is inflated, use the tire iron to pry the bead of the tire over the rim of the wheel. Be careful not to pinch your fingers!
Step 10: Repeat this process on the other side of the tire.
Step 11: Once both sides are done, lower the pressure in the tire to about 20 psi and check to make sure that the bead is seated properly. If it’s not, you’ll need to start the process over again. Pressure should be at 30 psi when you’re driving.
Step 12: That’s it! You’ve successfully set the bead on your tire. Now you can re-install the wheel and hit the road.
Tips for Setting a Tire Bead
Here are a few tips to make the process of setting a tire bead easier:
- If you’re having trouble getting the bead over the rim, try using a little soap or lube. This will help the tire slide on easier.
- If you’re using a tube, make sure to put a little lube on the inside of the tire before you install it. This will help prevent flats.
- Make sure your compressor is properly calibrated. You don’t want to overinflate the tire and cause damage.
- If you’re having trouble getting the bead seated properly, try gently tapping it with a hammer. This will help seat it correctly.
- Be careful not to pinch your fingers when you’re prying the bead away from the rim or installing the tube.
- If you’re using a sealant, make sure to follow the instructions carefully. You don’t want to make a mess.
- Have patience! Setting a tire bead can be tricky, but with a little practice, you’ll get the hang of it in no time.
Safety First: always wear gloves, goggles, and protective clothing when setting a tire bead. You don’t want anything to fly up and hit you in the face!
And be careful not to pinch your fingers when prying the bead away from the rim or installing the tube.
If you’re working on a car with an aluminum wheel, be very careful not to scratch the surface.
Use a tire iron or bead breaker to loosen the bead from the wheel. Start at the valve stem and work your way around.
Once the bead is loose, remove the tire from the wheel.
Deflate the tube completely and gently pull it out of the tire. Inspect the tube for any holes or leaks.
If everything checks out, reattach the wheel cover and you’re good to go!
Final Thoughts
Setting a tire bead is not as difficult as it may seem. With a little practice, you’ll get the hang of it in no time. Just be patient and follow the instructions carefully.
And always wear gloves, goggles, and protective clothing when working with tires. So get out there and start setting those beads! We hope this guide was helpful. If you have any questions or feedback, please let us know. Thanks for reading!
