Last Updated on March 13, 2023
Can you explain how to properly cap brake lines?
Brake fluid is important for your car, and it’s crucial to keep the system in good condition. That’s why it’s important to know how to cap brake lines properly so that you can keep the fluid from leaking out.
By following our step-by-step guide, you’ll be able to cap brake lines like a pro in no time.
What is Cap on Brake Lines?
Brake line caps are used to keep the brake fluid from leaking out of the system. There are two types of caps: plastic and metal. Plastic caps are usually found on older cars, while metal caps are more common on newer vehicles.
Metal brake line caps are typically made of brass or aluminum, and they’re screwed into place. On the other hand, plastic caps are usually pushed in or held in place by a retaining clip.
Why do You Need to Cap Brake Lines?
Capping brake lines are important because they prevent the fluid from leaking out. If the fluid leaks out, it can cause the brakes to fail. In some cases, it can also lead to rust and corrosion in the braking system.
Also, if the fluid leaks out, it can damage the brake lines and other braking system parts.
How to Cap Brake Lines in Simple Steps?
There are two ways to cap brake lines: with a plastic cap or with a metal cap.
Using a Plastic Cap
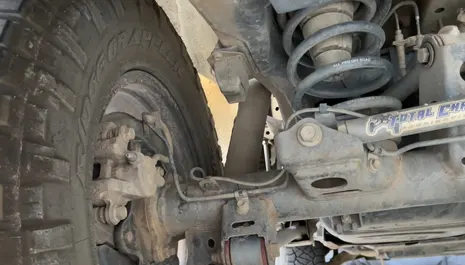
Step 1: Locate the brake line that you want to cap. It’s usually located near the brake caliper or the brake master cylinder.
Step 2: Identify the type of Cap that’s on the brake line. If it’s a plastic cap, a retaining clip will hold it in place.
Step 3: Use a flathead screwdriver to remove the retaining clip. This will release the pressure on the Cap and allow you to remove it.
Step 4: Pull the Cap off of the brake line. It should come off easily.
Step 5: Put a new cap on the brake line and push it into place. Make sure that the retaining clip is in place so that the Cap doesn’t come off.
Step 6: Test the Cap to make sure that it’s secure. You can do this by gently pulling on the Cap. If it comes off, then you’ll need to replace the retaining clip.
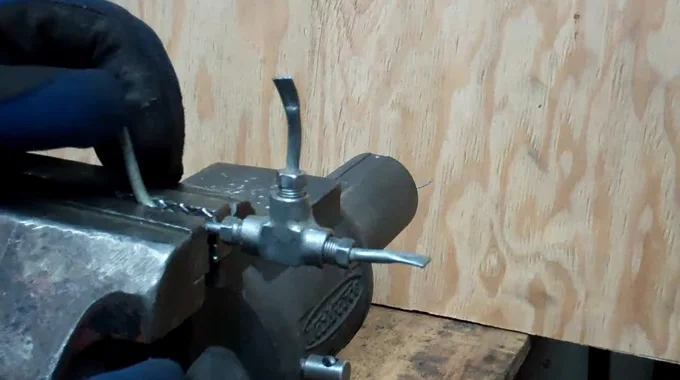
Using a Metal Cap
Step 1: Purchase a metal cap that is the same diameter as your brake line. You can find these at most auto parts stores.
Step 2: Place the metal cap over the end of the brake line. It should fit snugly.
Step 3: Use a hammer to gently tap the metal cap until it is snug against the brake line. Be careful not to damage the brake line while doing this.
Step 4: Trim off any excess metal from the Cap with a utility knife.
Step 5: Your brake line is now capped and protected from debris and corrosion. If you need to remove the Cap, simply use a hammer to tap it off.
Capping brake lines is a simple process that anyone can do. By following our step-by-step guide, you’ll be able to cap brake lines like a pro in no time.
Tips for Maintaining the Condition of Your Brakes and Brake Fluid
Here are a few tips to keep your brakes in tiptop condition:
- Check your brake fluid level regularly and top it up if necessary.
- Flush your brake fluid every two years or so to get rid of any moisture that may have accumulated.
- Bleed your brakes regularly to get rid of any air that may have entered the system.
- Inspect your brake pads and discs regularly for wear and tear.
- If you notice any strange noises or vibrations coming from your brakes, have them checked out by a professional as soon as possible.
- Don’t forget to service your suspension regularly, too – this will help keep your tires in good contact with the road and improve braking performance.
- If you’re going to be doing any heavy braking (e.g. on a long downhill stretch), build up speed gradually so that your brakes don’t overheat and start to fade.
Following these simple tips should help to keep your brakes in good working order and prevent any major problems from developing.
Common Mistakes When Installing Brakes
When installing brakes, it’s important not to make any common mistakes. Some of the most common mistakes include:
1. Not tightening enough: This can cause the brake pads to come loose and rattle around, which can be both annoying and dangerous.
2. Tightening too much: This can damage the threads on the brake caliper, making it difficult to remove the brake pads in the future.
3. Not aligning the brake pads correctly: This can cause the brakes to squeal or grind when they’re applied.
4. Not using an anti-seize compound: This can make it difficult to remove the brake pads in the future and may damage the threads on the brake caliper.
5. Forgetting to bleed the brakes: This can cause the brakes to feel spongy and may result in a longer stopping distance.
6. Not using the correct tools: It could damage the parts and make the job harder than it has to be.
7. Not following the instructions: This can lead to mistakes and make the job more difficult than it needs to be.
8. Trying to save money by using inferior parts: This can lead to problems down the road and may even void your warranty.
When installing brakes, it’s important to take your time and do it right.
Final Thoughts
Capping your brake lines is a simple and effective way to protect them from debris and corrosion. By following our step-by-step guide, you’ll be able to do it like a pro in no time. Remember to use the correct tools and follow the instructions carefully to avoid making common mistakes. Hope this guide was helpful.