Last Updated on March 19, 2023
Are you considering lifting your bike to take a closer look or perform repairs? Then you may think of using spool sliders for the job. But are spool sliders capable of lifting a bike?
Spool sliders are nifty little gadgets that make lifting your bike a breeze and provide a stable anchor point that ensures your bike won’t slip off the stand. With spool sliders, you can easily and safely lift your motorcycle in just five seconds.
But proper installation is required for the spool sliders to be able to lift your bike. They must connect to your motorcycle’s swingarm so that you can use it as an anchor point with a paddock stand. Choosing the right spool slider size, installing it, and checking its stability are essential before lifting a bike.
This article explains how to install spool sliders and use them to lift a bike safely. So if you’re ready, let’s get started.
How Can You Lift Bike by Spool Sliders: DIY Steps

If you’re looking for an easy and effective way to lift your bike, the simple solution is to use spool sliders. This technique has been used by professional bikers for years, providing them with a secure and stable platform that makes it easier to work on their bikes.
The first thing you need to do is choose the right sliders for swingarm spools. It’s about size, materials, looks, durability, etc. After that, you can install spool sliders on your bike in no time with just a few simple steps and prepare it for whatever journey lies ahead.
Here are the steps you need to take when installing spool sliders on your bike:
Step 01: Gather the Necessary Equipment
Before attempting to lift a bike by spool sliders, you must have all the necessary equipment. The two main items of equipment you will need are spool sliders and a rear paddock stand.
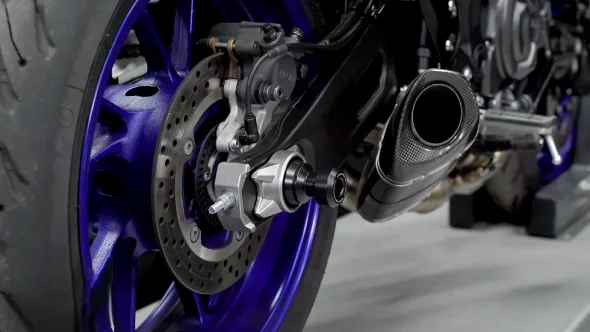
Spool sliders are typically made of metal or plastic and feature a central hole in the shape of an axle which is designed to fit into the attachment points on the rear swingarm of the bike.
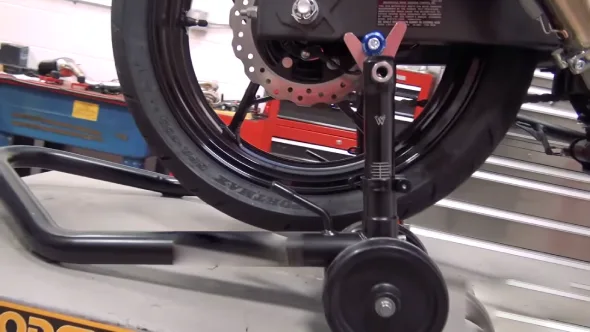
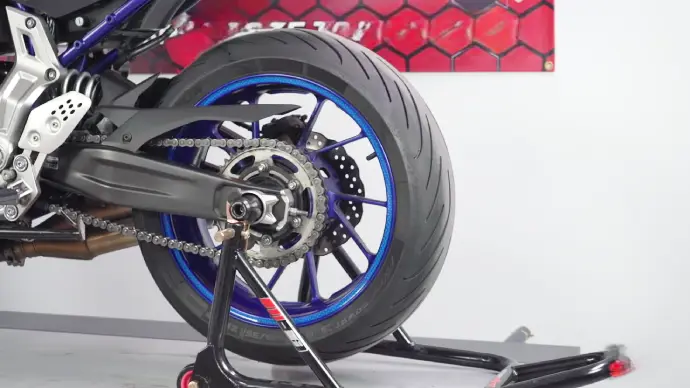
A rear paddock stand is a four-legged frame with wheels at the front two corners, making it easy to move around your garage or workshop. It can also be fitted with adjustable arms, allowing you to customize the position of your bike further while it is being worked on.
Step 02: Locate the Spool Slider Attachment Points
The spool slider attachment points are usually located on each side of the rear swingarm, just above where the chain runs through. Depending on your motorcycle model, these attachment points may be visible outside or underneath the swingarm. Check your owner’s manual for more information if necessary.
If there are no visible attachment points, then you may need to disassemble part of your bike’s rear suspension to access them. Once these attachments have been located, ensure that any dirt or debris has been cleaned off before inserting spool sliders into these holes.
Step 03: Positioning The Rear Paddock Stand
The next step is positioning the rear paddock stand to provide stable support for your bike while it is lifted using spool sliders.
When setting up your stand, ensure it has been placed evenly under both sides of your bike’s back wheel and sufficient clearance between its legs and any other nearby objects (such as walls or furniture).
Also, if possible, try raising and lowering one end of the stand to ensure it has been securely positioned before attempting to lift your bike with spool sliders.
Step 04: Insert The Spool Sliders
Once you have located and positioned all of the necessary equipment correctly, it’s time to insert each spool slider into its respective attachment point on either side of the rear swingarm.
Line up each spool slider so that its axle fits snugly into its corresponding hole and rotate until they are firmly locked in place. This should require minimal effort but take care not to over-tighten, as this may lead to damage or reduced performance in future use.
Finally, once both spools have been inserted correctly, you can lift your bike using a rear paddock stand.
Step 05: Adjust the Rear Paddock Stand
When lifting a bike with spool sliders, the next step is to adjust the rear paddock stand so that the spool sliders rest on the arms of the stand. This is done by loosening the bolts on either side of the stand and adjusting them until they align with the spools at either end of your motorcycle.
Be sure that you have securely tightened all bolts on your bike before trying to lift it. Ensure your paddock stand is in good working order and securely mounted to a stable surface before beginning any work.
Step 06: Lift the Bike
After ensuring that your paddock stand is adjusted correctly, it’s time to lift your bike. Place each foot of your paddock stand into its respective spool slider, ensuring both feet are firmly in place and secure.
Begin by slowly lifting your bike’s rear end off the ground until it reaches a height you feel comfortable working at. Be mindful not to lift too quickly or too high, as this could cause an unexpected drop or damage to your bike.
As you lift, double-check that all connections remain secure and watch for anything out of place or damaged.
Step 07: Check the Bike’s Stability
Once your bike has been lifted off of the ground, it’s essential to check its stability before proceeding with any maintenance or repairs. Carefully inspect all connections between your paddock stand and bike frame to ensure they remain tight and secure under pressure.
You should check that no nuts or hoses are stretched too tightly or rubbing against anything that could cause damage. You should also check that bearings, ball joints, bushings, etc., are not showing signs of wear.
If you notice anything abnormal during this inspection, lower your bike immediately and investigate further before continuing any work.
Step 08: Lower The Bike
When you have finished working on your motorcycle and all tools have been put away safely, it’s time to lower your bike back onto solid ground again. To do this safely, slowly lower your rear paddock stand and check for any instability before allowing all weight onto it once again.
Ensure all nuts and bolts are firmly secured and double-check that no additional adjustments need to be made before finally releasing your motorcycle from its elevated position.
How Does a Swingarm Spool Slider Help For Lifting a Bike?

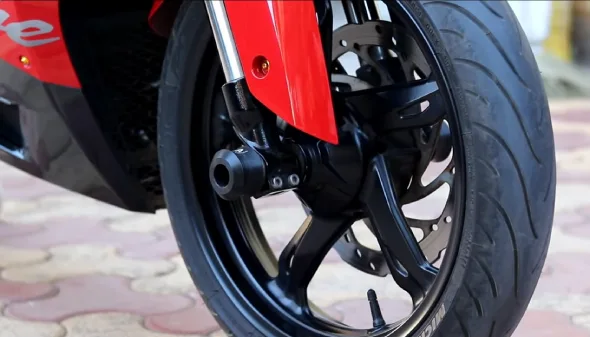
As mentioned above, a swingarm spool slider is an important piece of equipment for motorcyclists that lift their bikes with a rear stand. This small, round attachment, typically made from aluminum or steel, fits into the swingarm where the rear axle nut is located and provides a convenient place to attach the stand.
This setup allows the motorcycle to be safely lifted off the ground at a certain angle and helps protect the rear control arm in a crash. While this type of slider is useful for lifting bikes, it may not provide enough protection for the engine if compared to frame sliders.
Frame sliders are designed with more comprehensive protection in mind and offer protection for the engine and bodywork. But, some riders prefer using swingarm spool sliders because they are smaller, easier to install and generally cheaper than full-on frame sliders.
Depending on one’s preference and skill level when installing bike accessories, riders should consider their specific needs before choosing which option works best for them.
How Do You Lift a Motorcycle with a Rear Stand?
Lifting motorcycles with a rear stand requires first installing a swingarm spool slider into the swingarm where you would normally find the rear axle nut. This will provide an anchor point that the most common types of rear stands available today can be used.
Once firmly attached, you can use your paddock stand to raise up your motorcycle to whatever angle is needed for maintenance or repair work.
When lifting motorcycles, it’s important to always practice safety when operating support equipment like stands or paddocks. It’s also worth ensuring that all protective gear is worn while working on your bike so as not to put yourself at risk unnecessarily during maintenance procedures.
Maximize Your Bike Riding Safety and Efficiency with Installed Spool Sliders

Installing spool sliders on a bike is smart for any biker looking to increase their safety and efficiency. Riders can easily install these sliders by choosing the correct size and material, gathering the necessary tools, and properly positioning the rear paddock stand.
Once installed, spool adjustments can be quickly made according to individual preference. This minor procedure has significant implications for experienced bikers who understand how much easier this part of bike repair and maintenance can be when working with well-fitted and correctly adjusted spool sliders.
Get your bike ready today so you can hit the road tomorrow.
