Last Updated on April 13, 2023
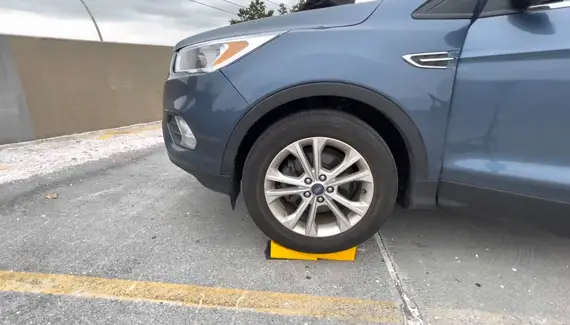
Wheel chocks are wooden, plastic, or metal wedges placed behind a vehicle’s wheels to prevent it from rolling. Leveling blocks are flat pieces of wood or plastic that are placed under the tires to level the car. When used together, wheel chocks and leveling blocks can provide a stable and level surface for a vehicle.
But how do you use wheel chocks with leveling blocks to ensure your vehicle is level and safe? To use wheel chocks and leveling blocks, you must drive the vehicle onto the leveling blocks and then put the wheel chocks in place. This will keep the vehicle level and prevent it from rolling while parked.
Please read the following to understand the different leveling blocks and how to use them properly with wheel chocks.
How to Use Wheel Chocks With Leveling Blocks in Steps?
Before you begin using your leveling blocks and wheel chocks, it’s important to understand how they work together. Otherwise, you could damage your vehicle or even cause an accident.
Here’s a step-by-step guide on how leveling blocks and wheel chocks work together:
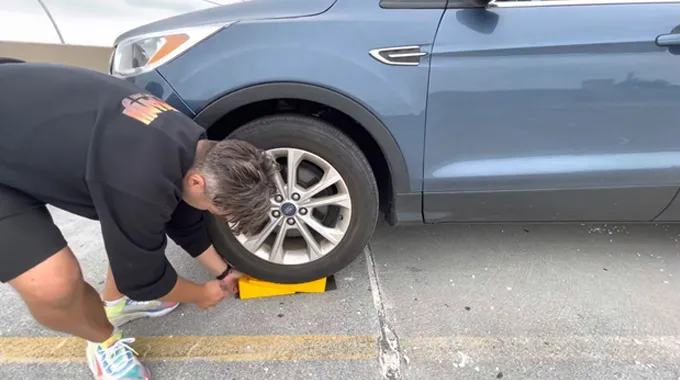
Step 01. Park your vehicle and put the parking brake on
Before you can level your vehicle, you must find a steady parking spot. Once you have found a suitable location, put the parking brake on to ensure your vehicle doesn’t roll as you put the leveling blocks in place.
If you are parked on an incline, chocking the wheels to prevent the vehicle from rolling while setting up the leveling blocks is also a good idea.
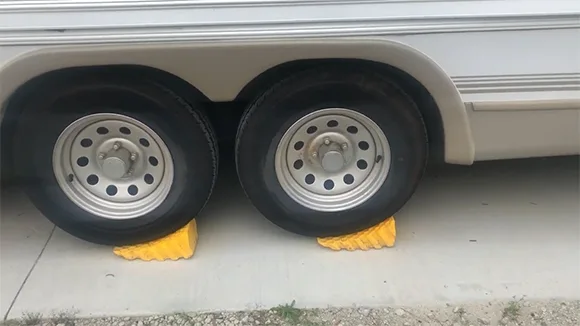
Step 02. Choke both rear and front tires
When you need to park your vehicle on an uneven or incline, it’s essential to use leveling blocks or wheel chocks to keep it from rolling. But how do you know which way to place the chocks, and how many do you need? The key is always to chock both sides of the rear tires and then chock both sides of the front tires.
This will help prevent the car from rolling forwards or backward, no matter how steep the incline. Also, it’s always a good idea to use at least one wheel chock per tire to be safe. With adequately choked tires, you can level out your vehicle using the leveling blocks.
Step 03. Use leveling blocks to level your vehicle
To use leveling blocks, start placing them at the tire furthest from the campsite’s utilities. Then, move your vehicle forward or backward until the leveling blocks are underneath the tires.
This will create a level platform for your vehicle. Next, you’ll need to ensure that the leveling blocks are firmly in place before attempting to chock the wheels.
Step 04. Re-chock the rear tires and the front tires
Removing the chocks from the rear tires may be necessary if you find that your vehicle is leaning too far forward. If this is the case, re-chock the tires in front of the front tires. This will help to level out your vehicle and prevent it from tipping over.
Be sure to use wheel chocks made of durable material that can be easily removed. This helps ensure that the chocks are properly positioned and will effectively keep the vehicle immobilized.
What Type of Leveling Blocks are There?
Leveling blocks are an essential part of the RVing experience. They help to keep your RV level, preventing it from rocking and rolling as you drive down the road. Various leveling blocks are available, each designed for a specific purpose. RV leveling blocks are available in three types today:
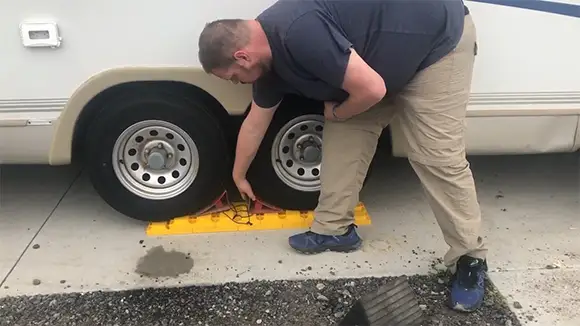
Interlocking/Stackable
In most cases, RV leveling blocks resemble large Lego blocks. There are a variety of sizes and weight capacities of these interlocking blocks, ranging from 3,000 pounds to 10,000 pounds.
It is advantageous to use stackable, interlocking leveling blocks since they enable you to adjust the height of your RV to your preference. The pyramid-shaped structures can also be quickly built with them.
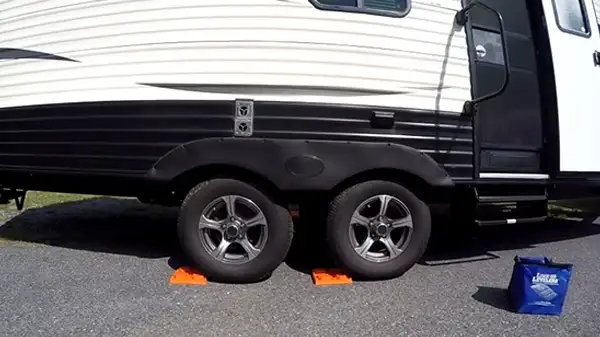
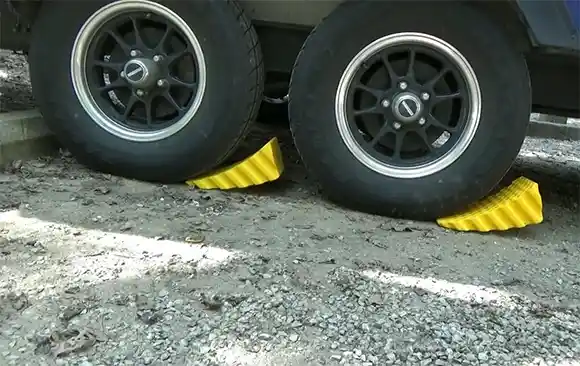
Ramps
A curved ramp-like towable RV leveler can be used instead of stacking leveling blocks. It’s possible to get a drive-on tri-leveler, a plastic stair that works as a stair. Alternatively, you can buy a rounded or curved vehicle leveler with double-wheel chocks (like the Andersen camper leveler, the CARMTEK camper leveler, and the Kohree camper leveler).
Camping alone is easier with these levelers because you only need to drive backward or forwards to set them. Many are also equipped with wheel chocks, so you can couch the wheels and keep them firmly in place.
Stabilizing Jack Pads
Although stabilizer jack pads are designed to support leveling hydraulic jacks and prevent them from buckling, they can also be used for leveling. For the stabilizer jacks to stand, they ensure the ground is even.
A jack pad is a flat platform that cushions the feet of the jack while supporting the jack’s weight as well as the weight of the camper. In some cases, jack pads have to carry handles and can be carried and stored together.
Why Do You Need to Level a Vehicle With Leveling Blocks?
Many people think that the only reason to level a vehicle is so that you don’t have to sleep on an incline. Although that is one benefit, there are several reasons why leveling blocks come in handy. For one, it helps maintain all your systems’ functionality, including your plumbing.
When you are properly leveled, your tank sensors will give you an accurate reading of how full or empty they are. Also, leveling blocks can help you avoid damage to mechanical parts like energy slide-outs.
If your vehicle is unleveled and you try to use one of these features, it puts unnecessary strain on the motor and could cause a breakdown. Eventually, this will reduce any wobble you notice, allowing you to remain more comfortable.
No one wants to feel like they’re constantly rocking back and forth while trying to relax after a long day of driving. You can avoid all sorts of big and small issues by taking the time to level your vehicle with some trusted leveling blocks.
Can You Get Affordable Wheel Chocks for Incline?
You can get low-cost wheel chocks for incline. Our blog already posted a review of the most affordable wheel chocks for incline that are available on the market.
With their thoughtful design, high quality materials, and trusted durability, you can know your vehicle is safe when using these budget-friendly wheel chocks. Perfect for any occasion where you need to park on an incline, they make a great value purchase that will keep your vehicle secure so you can go on with peace of mind.
For a hassle-free parking experience on inclines, secure your ride with these affordable wheel chocks. Keep your car safe and sound, and no more worrying about rolling away.
Do You Use Wheel Chocks With Vehicle Leveling Blocks?
Wheel chocks are an important part of the leveling process, and many vehicle & RV owners use them alongside leveling blocks. Wheel chocks help to prevent your RV or vehicle from rolling forward or backward while you are leveling it, which can be a big help if you are working on uneven ground.
They are commonly used on trailers, RVs, and other vehicles that are likely to be moved around frequently. Wheel chocks can be very useful when parking on an uneven surface, as they can help prevent the car from rolling backward or forward.
Also, wheel chocks can provide extra stability for your vehicle while setting camp or storing it. If you decide to use wheel chocks, place them on the opposite side of the level from the tire you lifted. This will help keep your car stable and level while working.
But, they should not be used as leveling blocks, as they are not designed to support the vehicle’s weight. If you need to level your vehicle, use leveling blocks instead. It prevents soil erosion and keeps the vehicle from sinking into the soft ground by evenly distributing its weight over a larger surface area.
Where Do Wheel Chocks and Leveling Blocks Go on a Vehicle?
Wheel chocks and leveling blocks are common vehicle accessories that help keep a vehicle stable while parked. Both items serve the same purpose: to keep the vehicle from rolling when it is parked.
Wheel chocks should be placed behind the wheels on the side of the vehicle opposite the direction you will be exiting. This will ensure the vehicle doesn’t roll away while you get out.
Leveling blocks should be placed under the vehicle’s wheels closest to where you intend to exit. This will help stabilize the vehicle and reduce the risk of tipping over.
If a vehicle is parked on a slope, the chocks and blocks can help to keep it level. Also, chocks and blocks can be used to secure a vehicle that will be towed or moved. But wheel chocks and leveling blocks should be checked before each use to ensure they are in good condition and fit snugly against the wheels.
When Should Wheel Chocks be Used With Leveling Blocks?
Wheel chocks should be used with leveling blocks when parking on an incline so the vehicle does not roll. Using wheel chocks and leveling blocks will ensure that your RV is secure and will not move when you are not expecting it to. Wheel chocks should be used with leveling blocks when parked on uneven ground.
Placing the RV leveling block under the tire with wheel chocks helps keep the vehicle level and prevents the tire from rolling. This provides an extra protection layer and helps keep the vehicle in place.
Also, wheel chocks should always be used when loading or unloading a vehicle, and leveling blocks should be used whenever the vehicle is parked on an incline.
Do I Need 2 or 4-Wheel Chocks for Leveling Blocks?
Many think 4-wheel chocks are the best way to level your vehicle. But 2-wheel chocks can be effective in some cases. If your vehicle is parked on an uneven surface, 4-wheel chocks may not contact the ground, making leveling difficult. The standard notes that chocks should be placed under the rear wheels, meaning two chocks should be used.
In contrast, 2-wheel chocks can be placed independently, so you can ensure that they are always in contact with the ground. Also, 2-wheel chocks are often easier to remove than 4-wheel chocks, making them a good choice for those needing to level their vehicle frequently.
If you have a larger trailer or are concerned about the possibility of the rear wheels rolling, you can use four-wheel chocks, one under each wheel. This will provide more excellent stability and peace of mind.
How Many Chocks Do You Need for a Single Axle RV?
If you own a recreational vehicle (RV), you know that proper maintenance is key to keeping it in good condition. Any time you park your RV, you’ll want to ensure it’s securely stopped. This is especially important if you’re parked on an incline, as there’s a risk your RV could slide or roll if it isn’t correctly choked.
So, how many chocks are required for a single axle RV? It is generally recommended to use two chocks for a single axle RV and four for a double axle RV. This will help ensure your RV stays in place, even if a strong wind hits it.
Of course, you should always use your best judgment when choking your RV. If you’re parked on a particularly steep incline, you may want to use additional chocks to be on the safe side.